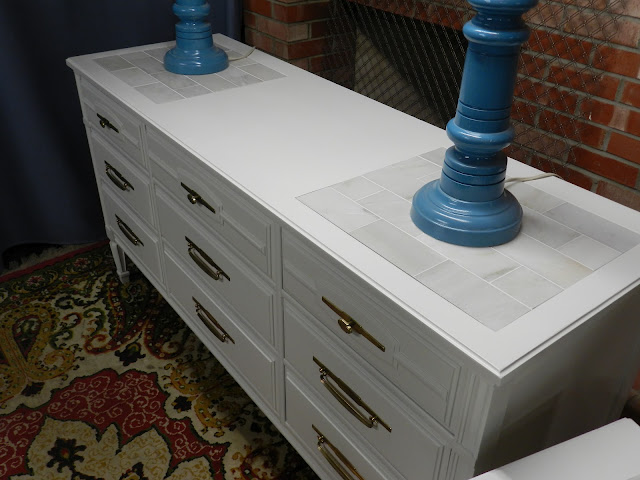
I hate to say that the marble was "ugly", how can natural stone be UGLY?!?! It really wasn't, but for this particular dresser, which I saw in a shade of white, with its pretty detail, the brown marble just wasn't gonna work. But I had a plan.

A customer was eyeing the set. I knew she liked it, but not the marble. I told her of my brilliant idea of replacing the marble with a light carrara or calcutta marble, weather she was going to buy the set or not, that was my future plan.
I knew that replacing the almost 1"thick piece of stone was way out of my budget, so didn't even consider that route. But Plan A was to get an 18"x18" piece of 1/2" thick marble tile, cut it to size and lay it on a board inside the inlay. That way one would never know it was not a big fat thick piece of marble. But after tons of running around and investigating, even with my "awesome" discounts (sarcasm) at the flooring places I belong to, I still could not get this down to under a $150 project. I could not believe how much the price jumps up when you go larger than a 12" x 12" piece of marble!
So on to plan B. Knowing I needed to go with smaller tiles, I thought the 3"x 6", laid out in a brick style would look best. I wanted to keep the grout line tight and got SOOOO LUCKYYYYY that I could make them fit perfectly with only having to cut the ends. That never happens to me!
I purchased the tile at Home Depot. I had my daughter with me and she could not believe that I was removing every piece of tile from the box, inspecting them for perfection. LOL! That's what I do if it's a natural stone. You should have seen me when we did our master bathroom. I literally grabbed a seat, on the floor at Homey D and went through TONS of boxes hand picking my pieces. I am sure they were not crazy about it but I don't care! This stuff is expensive and I am picky!
After purchasing my materials, tile and board, I got to work. I cut the boards to size. Dragged out my tile cutter and cut my tile. I didn't want to use mortar because of the thickness it would add so used an adhesive for marble and stone that I had left over from a project on our last home. Normally I would only consider using adhesive over mortar on small, low traffic areas like a back splash, so it was perfect for this type of project.
My wonderful father in law came through for me...again! He had some bright white grout laying around so I didn't have to purchase an entire box when I only needed about 1 cup of grout. I normally would say white grout is the devil, but for the top of this dresser and tiny grout lines, I knew it would look best. Not to mention I will be sealing the stone and grout.
And now I have a nice marble cutting board in my kitchen!!


I really liked the original marble inset but I agree, it doesn't match with a clean white make-over. What a brilliant idea Julie and it looks fabulous! Even more fab that you did it cost effectively! And ohhh....I would inspect every tile too ;)
ReplyDelete