PAGES

Friday, July 27, 2012

MINI MASTER BEDROOM UPDATE

I was planning on doing a little "before and after" on my bedroom.  All I really did was make some orange/coral pillows for the bed and reupholster the bench.  Unfortunately I LOST all my before pictures!!!  I am so sad:(

Anyway, I will just show you the "after" and have you try to imagine how boring the room was without a pop of color:)

I have always had my bedroom kind of monotone (boring) in color but was ready for a little sumethin sumethin.


 For a 1960's home we have nice size rooms and great closet space with a double set on each wall.  It's not a walk in closet, but I'll take it!


I added trim the the otherwise plain ceiling shade.  I can't seem to leave anyting alone!

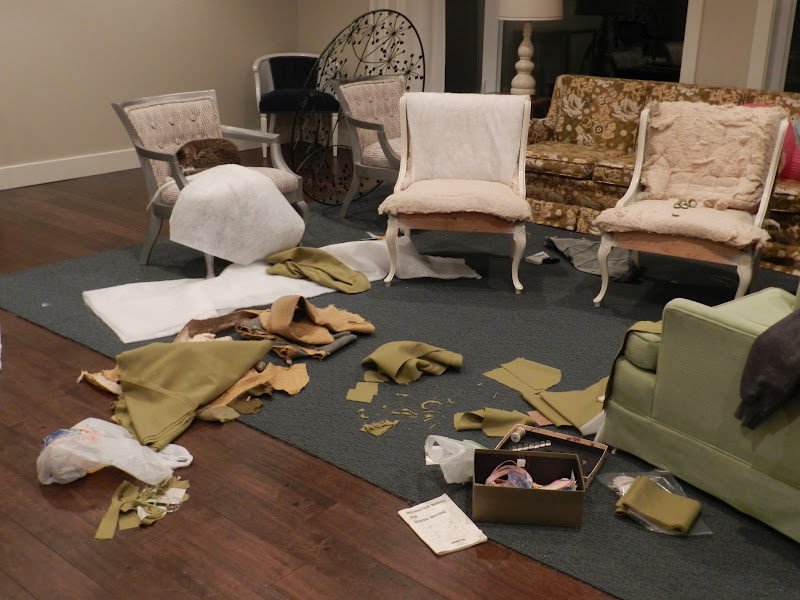
I think was was most impressive about the "little" update was how messy I managed to get my living room to just make a cushion and 2 pillows.  What I thought was going to be a quick little project turned into a 6 hour ordeal.  I lost that picture too, but it resembled something like this.  I decided not to do a tutorial on making the cushion as it would have been pure torture for both me and you. I kind up made it up as I went along anyway...I am NOT a natural seamstress and I swear a lot when I use my machine...  I think it's a lemon (no way it me)!


For the fun of it, here are a few "before" pics we took when we were looking to buy and renovate the house.

The house had the old boiler heating system and 80% of my baseboards looked like this before we bought the house.


One of the closets before we reconfigured it a little and changed doors out.


We actually removed the left closet next to the bathroom so we could put in a pocket door to the master bathroom and have a space to hang the T.V.

You can check out the Master Bathroom Reno in an older post.  I would insert the link here, but don't know how yet. (anyone, anyone?!?!)


Wednesday, July 25, 2012

POTTERY BARN MAKEOVER

I had a customer bring me a Pottery Barn piece she found on CL for super cheap.  It's hard to tell from the photo but it was pretty dinged up and needed some TLC.  The size and price were right, but for her, the color was wrong.

(wait wait wait...this is the "ugly" before::))


Enter Creamy white!  I removed the back panel so she could let the pretty wall color in her kitchen show through, patched, sanded, and sanded, and sanded!  Those factory finish paints really need to be sanded good so that the primer will stick.


Just like new!


Saturday, July 14, 2012

PERFECT MIX OF VINTAGE AND MODERN

 I am so in love with this piece and I feel like being an "Indian Giver"! (kidding Libbie, it's yours:)) My client is going to use this in her office as extra storage.

I love the mix of vintage lines and glass knobs with a modern lacquer finish and modern satin nickle hardware.  Exactly my style!


Gotta have a "before" picture!

Friday, July 6, 2012

XOXO


Since painting the girls room a shade of coral I have been wanting to add gold in some way as wall art. Because of the fact that I think I have to either use vintage pieces as wall art or make them myself (buy brand spanking new...NO WAY!)  I decided to do a fun and inexpensive project that I have been thinking about for a while.


I found these paper mache letters at Joann's, primed and sprayed gold.  EASY!!!