PAGES

Monday, February 24, 2014

ANTIQUE VANITY TURNED FUNCTIONAL DESK


She turned out wonderful buuuut….


I will be honest, I was a wee bit concerned about this piece. 
I knew it was solid and well put together.  It had lasted for over 60 years and is going to last another 60 but it was on the "rough" side.  

Even so, I loved the sweet, simple detail and knew it would look beautiful with the right finish:)


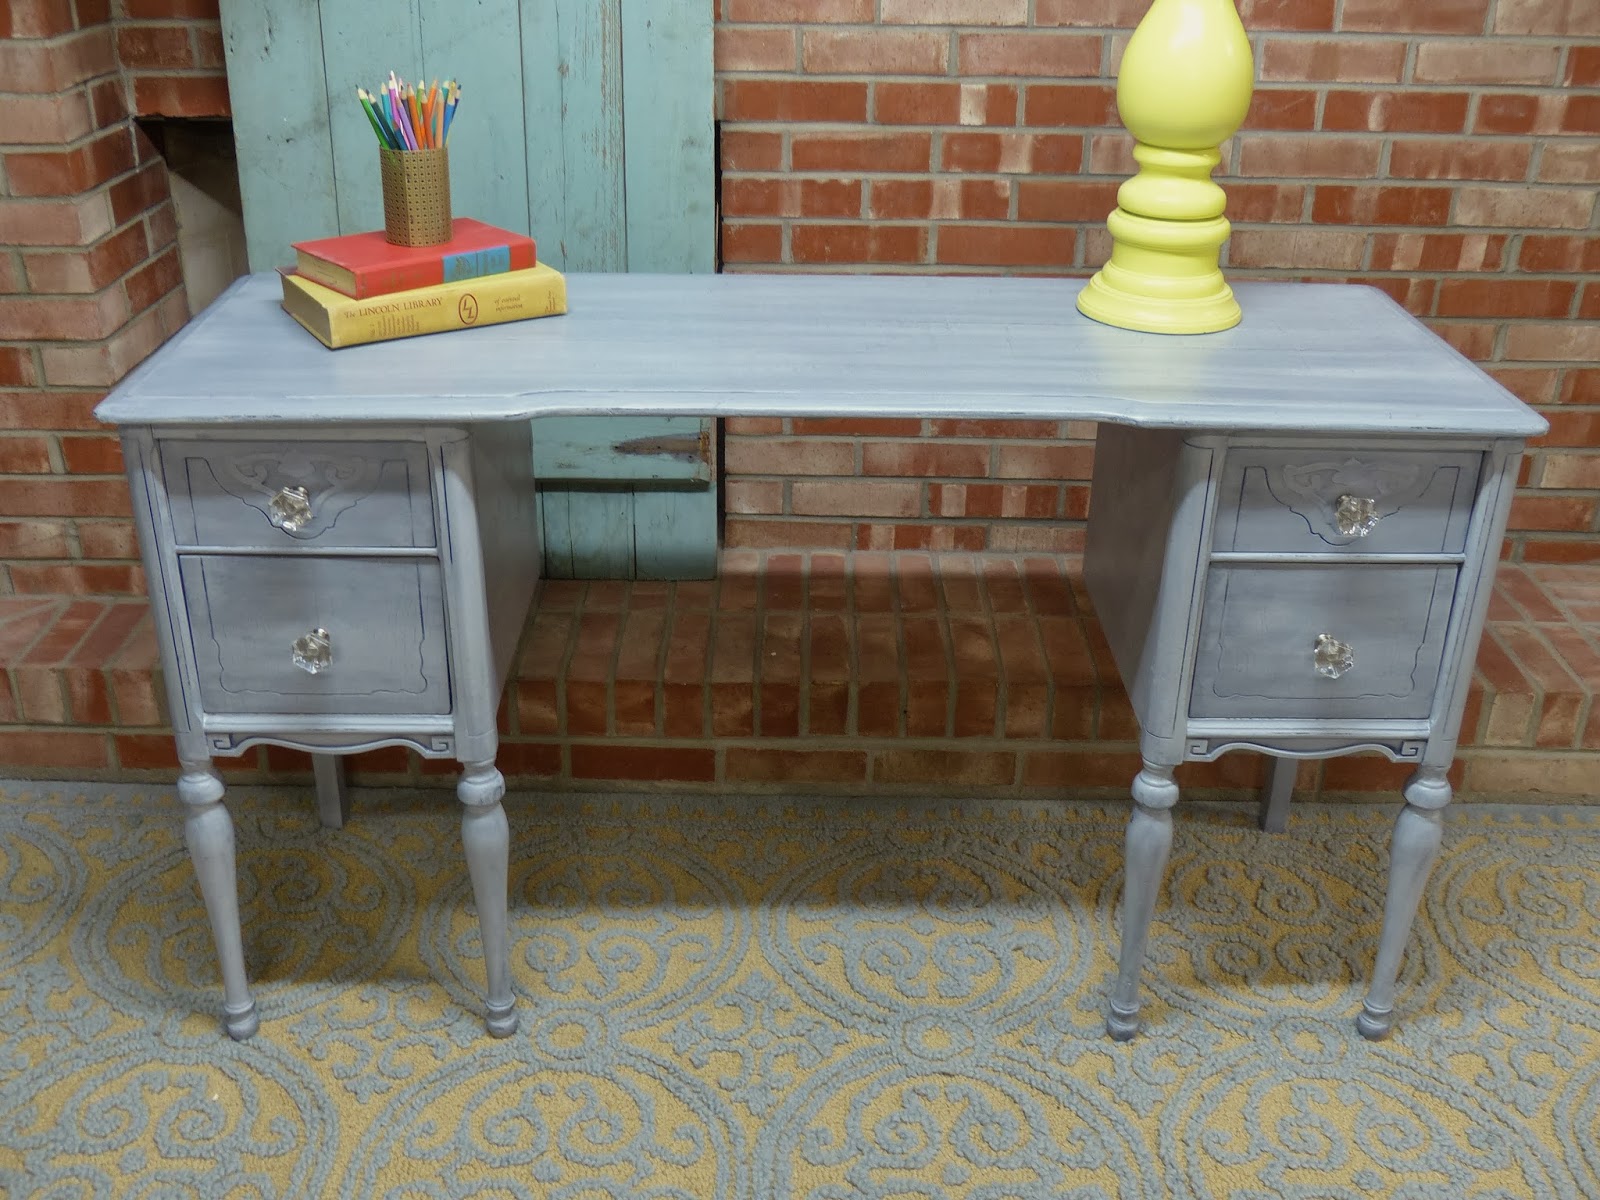
Originally this piece was an antique dressing vanity.  But really, how often do we sit, gazing into the mirror and run the brush through our hair 100 strokes? Not happening often over here and I wanted to make it a function desk.  

I took it apart months ago and let it sit on the sidelines until the perfect top came along.  


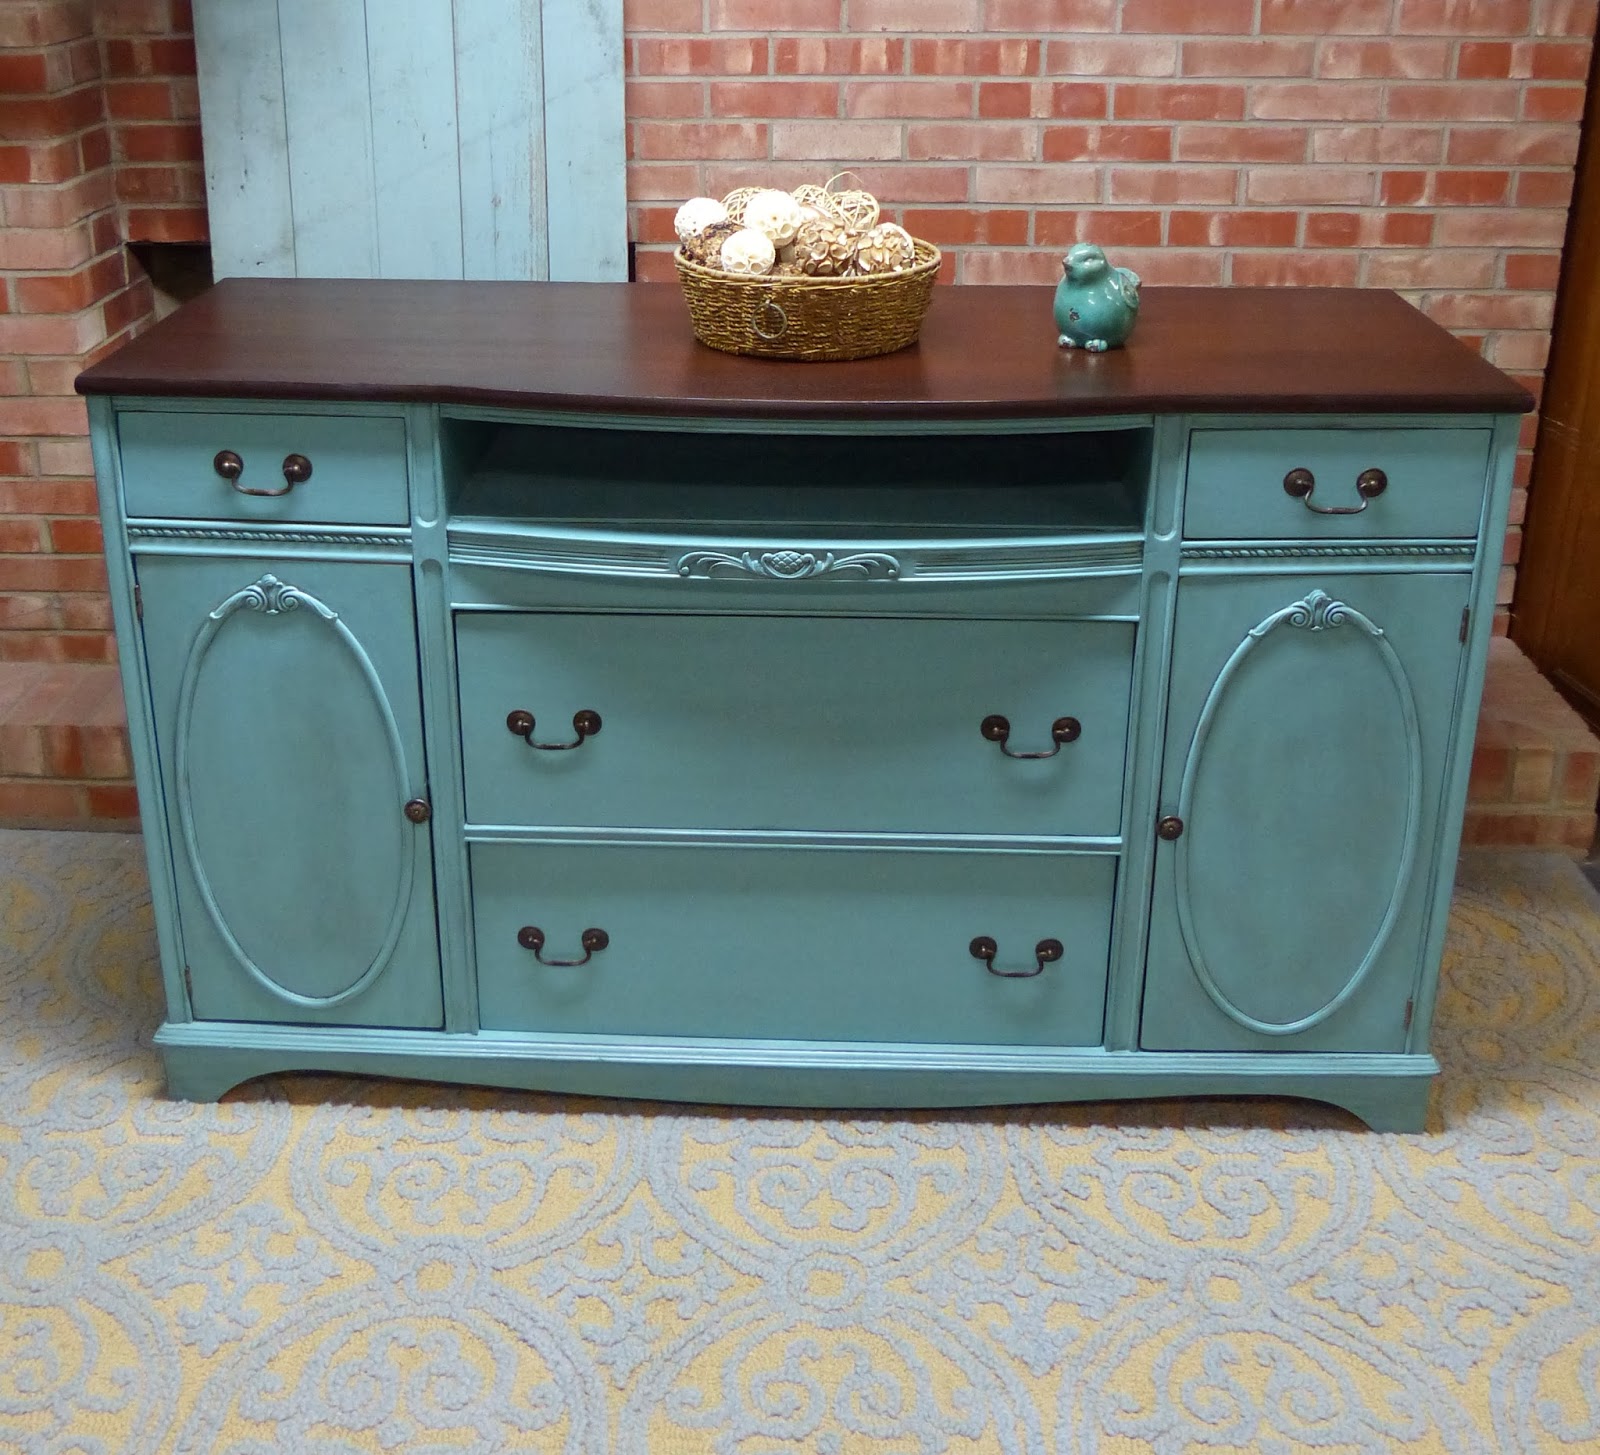
Alas, this buffet top was available when I needed to remove it to make this piece into as a bathroom vanity for a customer (which was a pretty cool project and you can go HERE for details).

**side note…this is the first time I have ever used the word "alas" and am not sure how I feel about it**


I do love how it turned out:)  
I have never done a "colored" glaze before but the customer wanted a navy glaze over the gray/blue base.  


I mixed the glaze myself with 50/50 navy acrylic paint and SW clear glaze.  
I love how the dark glaze fell into the tiny cracks and imperfections of this piece.  


Saturday, February 22, 2014

MASTER BEDROOM MAKEOVER

**First let me start by saying that I am NOT a designer (or photographer), nor do I pretend to be one. So if "design rules" are broken, no judging:)

I have a fair amount of color going on in much of my house so really wanted a softer, "tone on tone" type of look for this room. 
I am super lucky in the fact that Marc could really care less about what I do, as far as decor goes, in our home.  Not only is he pretty much color blind, but he knows I will do what I want to do anyway, so why argue:)  Hence, the "blush"tone of the quilt... I LOVE that man!


Here is a before picture of your bedroom.  It was not bad, I was just ready for a change and had been wanting to do something different with this bed and nightstand set that we've had for years.


I really love this metallic finish.  I am starting to think that every room of my house needs it somehow!  Check out my post on how to fix floppy, sloppy shams here.  It works beautifully and wish I thought of it years ago!


The bedding was purchased from Target and I bought the lamps from Hobby Lobby.  I had my eye on these lamps for over a year and so excited to finally have a reason to buy them!


Finding bedding was as difficult as finding the wall color!  I bought and brought home 3 different combinations before I picked this one. 


I painted the nightstands in SW-Cotton balls. It is a nice, soft white and the same color as the trim throughout my house.  


 The curtains I found at BB&B.
I purchased the rods from Target and sprayed them in Rustoleum Pure Gold.  


Mini me helping iron the curtains.  She actually did a pretty good job!


I bought this wall art from an estate sale last year that I had forgotten about.  I was super excited to stumble upon it when I was working on this room.

 Love how fancy my curtains look when the heat is blowing!  Go here to see the post on our master bathroom reno we did back when.  Still one of my favorite bathrooms we have ever done.


I do not know the color of the walls because I mixed a bunch of colors together to get what I wanted after realizing I couldn't find it on a color strip.  I would say it's closest to BM Gray Owl with a few LESS drops of blue.


Now to be honest and show you the ugly bench at the foot of my bed. I have dragged this guy around for years.  It has been outside in 2 homes, in mudrooms and now in my bedroom.  Until I find a pretty dark gray little tufted sofa (for under 8 million bucks) it will stay at the foot of my bed:)


FANCY UP A CHANDELIER

I love how this little project turned out! 
I could tell from my clients personality and what she wanted to do with this chandy that she was fun and creative and it shows in this photo of her beautiful dining room she sent me.


I was pleasantly surprised when she brought it to me with the areas she did not want sprayed, already taped off.  Saved me a ton of time.  
She purchased this from World Market


This was a bit challenging.  You would think, "oh, just spray it", like I did at first,  but quickly realized to get a NICE and EVEN spray, each bead would need to be 
 slightly rotated with every coat.  
The beads had a coat of clear on it that repelled the Krylon Ocean Breeze blue spray, so it definitely needed to be primed first.
This little guy spent 2 days in my spray booth getting hit whenever I remembered:)


My customer glued the glass stones on herself.  I LOVE how this turned out!

Wednesday, February 12, 2014

QUICK STAINABLE FILLER OPTION

I posted a question on my FB page the other day asking if anyone had a truly good stainable filler.  I have tried a few of them and have yet to find one that works well.  

I actually find that sometimes I am best to just leave a scratch or knick alone and once it is stained, tends to stand out less than if I tried filling it.


But these guys, I wanted to fill...


A lot of the answers were to mix some of the sawdust from the piece with glue.  I have known about this method and tried it a few times but it never worked like I was hoping.  And maybe it was the glue I was using that was the issue (Elmer's).  I have also used minwax wood putty with some success and would have been a good 'after staining' option.  I would mix a bit of a few colors to get the tone of wood I was working on. 


Because I know wood filler dries hard, I thought that I could try adding the sawdust to that. 

So I got me a bit of Elmer's filler and dabbed in into the pile of sawdust on my dirty floor

After mixing it together, I filled in the small gaps on top of the buffet.

(BTW…No, I wasn't jumping up and down when I took these horrible phone pics, I'm just a very bad photographer:))

 Then I grabbed more sawdust off of my dirty floor and packed it in good!

After letting it dry overnight I sanded it down very well, getting as much of the filler that was on the wood, surrounding the scratches, off the best I could.

When I do this again, which I will, I will definitely take a bit more care in trying to keep the filler off of the wood because the filler itself doesn't take the stain, just the sawdust crammed into it.

After 2 coats of General Finishes Java Gel stain, I think it looks pretty good!


Sunday, February 2, 2014

IKEA SHELF UPDATE

We purchased these shelves and brackets after a trip to Ikea over a year ago. As my husband was installing them, I was already making plans (in my head) of changing out the shelves.  The brackets were pretty cool, but the cheap laminated shelves…they had to go!

Looking back, I am bet I could have just bought wood shelves while there and stained them myself but pretty sure my husband and kids were on their last leg and I was just grabbing stuff on my way to the check out isle like I was on a game show "How much crap can you throw in the cart in 3 minutes"!  So didn't get time to think.


While at Lowes last week, looking for items for a clients project, I decided to look for material for Jack's shelves.  These stair treads were the perfect thickness and length.  Just needed to take a bit off the width….


It's not that I CAN'T rip down a piece of wood…It's just that hubby happens to be much better at it.  Plus, my body does not function well in cold weather:)


I used the chunk that we cut off as a 'sample board' to test stains and see what I wanted for the room….


After playing around with stains for a bit and layering, I decided that Rustoleum driftwood (a gray tone) with Minwax Dark walnut over top, was what I wanted for the room.


Here is the result of that.  I like the gray base but a little brown over top made the graining stand out more.


Little sis helping him with display, which I actually let him completely do (not an easy task for me:))


Seriously think he did better than I would have!


Couldn't help but sneak a picture of his dresser in this post!   I LOVE this piece!


BUFFET TURNED TV CONSOLE

My husband came with me to pick up this piece.  I could tell by his "you promised no more pieces that need tons of work" look he was giving me, that he did NOT want me to get this piece.  Selfishly, ignoring his look and said "load er up"!   

I have learned that sometimes, just because the price is right, it's not worth the time I would need to invest to fixing it up.  Still, I couldn't pass on this one!  

It really did need a lot of TLC.  All the drawers were missing runners, the door hinges were stripped and bent, and it was simply not taken care of over the years. 

The top drawer was missing a few parts so I thought it would be a good opportunity to frame in and finish off the top middle drawer, make this an entertainment center.
Thankfully the middle drawer, although in pieces, still had the original hardware on it.  This was perfect since I had 2 missing piece on the bottom drawers.  Seriously though…how do you lose hardware?  


Stripping the top


It's hard to see in the 'before' photo but someone went to town on this drawer with a belt sander and  took WAAAAY too much off on the edges.  I ended up having to actually add shims to a few areas to build it back up.  I use filler a lot but in my opinion, wood was needed to fill in that space and not just a ton of filler. 


Finally stripped, filled, sanded and ready to be primed


I used my new favorite product…General Finished gel stain in the color Java.  
After a few coats and it was dry, I covered the top so I could work on the base.


I added the inside panel it was sprayed because I wanted to spray the panel as well. This meant I would be doing some touch up after installing, but made sense on this piece.

After cutting and gluing the inside board, I needed my handy drill extension thingy to get into the tight space bc nail gun would not fit.


Bad photo, but just wanted to show that a little extra work, like filling in the seams can make a piece look so much more professional. 


Ready to be glazed!  


 After glazing and adding a few coats of clear lacquer, she's ready to go!