PAGES

Wednesday, July 30, 2014

RAMPING UP HARDWOOD FLOOR JUST A BIT TO AVOID A THRESHOLD!

Even after laying extra subfloor and doing what you can to help the transition of materials from one room to another to be as smooth as possible, there may still be a small "lip" that will either need a threshold of sorts or be an unsightly 'toe stubber'.  Here is what we have done in all of our homes that have worked beautifully!

We have used shims to meet up with the new flooring.  

I wish I thought about getting pictures sooner in the process but hopefully you get the idea.  

After setting up the tile underlayment (not actually installed yet) and then the tile to figure out the exact height of the floor we will be butting up to, we decided where the shims needed to be cut to achieve the perfect height.  

The shims were glued with construction adhesive and nailed.

Just a random photo but thought any photos might help.  Here, Marc needs to trim the wood to fit around the wall and was also wanted the 'tongue' removed butt up against the tile.

Another view.

And another.

If you are worried about it feeling like a "ramp", it doesn't at ALL!  It is the slighting incline and I promise you will not notice it at all:)

Like I mentioned, we have done this many times, on many homes and it has always worked beautifully.


Sorry about the messy photo but just a larger view.  We will be done with this reno…someday!!

Monday, July 28, 2014

DRILLING PERFECT HOLES FOR NEW HARDWARE

It's not often I pat myself on the back but will have to say, after the hundreds of hardware holes I have drilled and even a few mess ups, I have perfected the art of drilling holes for new hardware perfectly!  I'm pretty quick too:)
Although I have to admit, that if I have had a glass of wine  I should probably just save this job for the next day…just sayin

The before.  I LOVE the original hardware on this piece but we were going for a more masculine look and clients loved this modern hardware.  Also, if you look closely, whoever originally installed this hardware didn't do a very good job. Many were a wee bit off.

1-First thing I do is line the drawers up, the ones that are going next to each other and make sure they are facing the same way (open drawer area up). Not all drawers are the same height going DOWN the dresser and you may be adjusting holes, but the side by side drawers, you WILL WANT to make sure the holes are EXACTLY lined up for sure!

2-put a piece of tape in the area you will be marking and drilling

3-Find the CENTER of each drawer (the long way) and make your mark.


4-I do not always feel you need to find the EXACT center of the drawer from top to bottom but tend to find a solid measurement very close to the center that will look nice and be easy to obtain on each drawer. 


5-This is where I ditch the tape measure and use a smaller ruler.  Much easier to work with.

Find the hole spread on the hardware and find the center. I got lucky and had a simple 3" spread, so the center was 1.5".

Below you can see my marking for the center and how far down I decided to go. I put that 1.5" (center of hole spread) at my center mark of drawer to find the 3" hole spread.


 6-Mark where the holes will be drilled.

 7-Make your marking on how far down to go

8-Double check all of your measurements and drill the holes!  The tape will not only help with keeping the drawer front clean but will help the make for clean holes:)

Saturday, July 26, 2014

EASY STEPS WHEN CHANGING DIRECTION OF HARDWOOD FLOORING

2 years ago we laid the hardwood flooring in our living room, dining room, foyer and hallway.  Knowing that this renovation was in the future, we purchased enough to run through the rest of the area we would be doing hardwood.  Good thing we did because just as I predicted, it has now been discontinued, just like my favorite lipstick.  WHY would anyone discontinue something so perfect!
I really miss that lipstick.

Anyway, when transitioning into the kitchen from the dining room, we needed to run the flooring in the opposite direction. That becomes an issue when it's a tongue and groove floor and you are now missing the tongue.


No worries…you just need to make one!
We found a piece of thin ply in my scrap pile that fit the groove snuggly and ripped it down to the correct size, which was about a 1/2" wide.

(just for the record, this was a piece of beat up scrap wood:))


We then glued the ripped down strip into the groove, ready to accept the wood running in the new direction.

Now the wood going in the new direction has someplace to attach…into the new tongue.
First piece in place.

 and so on and so forth...

Our professional hardwood floor gluer.

We had JUST enough wood to finish the job!


Tuesday, July 22, 2014

CREDENZA UPDATE…finding inspiration from items around the house!

I LOVE this piece! It turned out so glamourous!


When my client came to check out my inventory she quickly fell in love with this beautiful piece and knew it was the piece for her new home but wasn't sure exactly what finish she wanted.  She did however know that she LOVED this piece of decor that she had and was hoping to do something similar in color but with a darker glaze.


I used a mustardy yellow base called Ceremonial Gold by SW and applied a black/brown glaze to the top before sealing.


Original hardware we redone in Oil Rubbed Bronze


DIY ROPE HARDWARE

Often times I am not 100% sure how I am going to accomplish a particular project until I am walking around Lowes and figure it out…such the case with this rope hardware.
Marc was with me on this trip and after hearing my original plan on how I was going to secure the rope (which I don't even remember anymore:)) he suggested I use crimp sleeves.


These are the tools and products I used for this project


I think getting the knots even was the trickiest part of all! Make sure knots are as TIGHT as you can get them.

I didn't want to drill the holes in the drawer front larger to accommodate for the thick rope, so I unraveled the ends, cut off 2 of the pieces of rope and secured the cut off ends with a few dabs of super glue.  


I put a little tape at the end of the rope to help it fit through the drawer hole easier as well as the crimp sleeve slide on nicely.

 Although you are suppose to actually apply the crimp sleeve INSIDE the drawer, this was a better photo to show you how it's done. Squeeze super duper tight!

While inside drawer, where you really do want it to me:)


The rope was only sticking out about an 1" - 1"1/2" which didn't bother me but one is welcome to go as short as you dare.  Just make sure you have enough room to get the sleeve on.

I promise, if you squeeze the crimp hard enough, they are not going anywhere!  As a matter of fact, you will need to cut them with a razor blade (careful!) to remove.

Tuesday, July 15, 2014

BATHROOM BEFORE AND AFTER

Although we remodeled this bathroom only a few years ago, there are a few things that I would do differently (like the cabinets),  I still really like the sink with double faucet set up I did.


This is the "kids" bathroom so often times, there are 2-3 big kids in here getting ready at once. I really like and wanted double sinks but there is something I have learned about my kids…they LOVE to hang out in the bathroom! There is a lot of fun, laughing and serious chatting that happens in there.  So, not only are we a "hang out on the floor" family, but evidently we like to sit and hang out on countertops too:)  So I had to decide between A-a ton of countertop space for "stuff" and hanging, or B-double sinks for that 2 minutes here and there

In order to get the best of both worlds, I decided I would find one large sink that was made for 2 faucets. I quickly realized that a set up INTENDED for 2 faucets were way out of my budget.

I started looking for the largest and longest vessel sink I could find (this one happens to be 30" long and 16" deeps),  2 simple, single handle faucets and talk my hubby into this idea, that I might be able to make it work and stay well within my budget.

Glad I took the plunge!

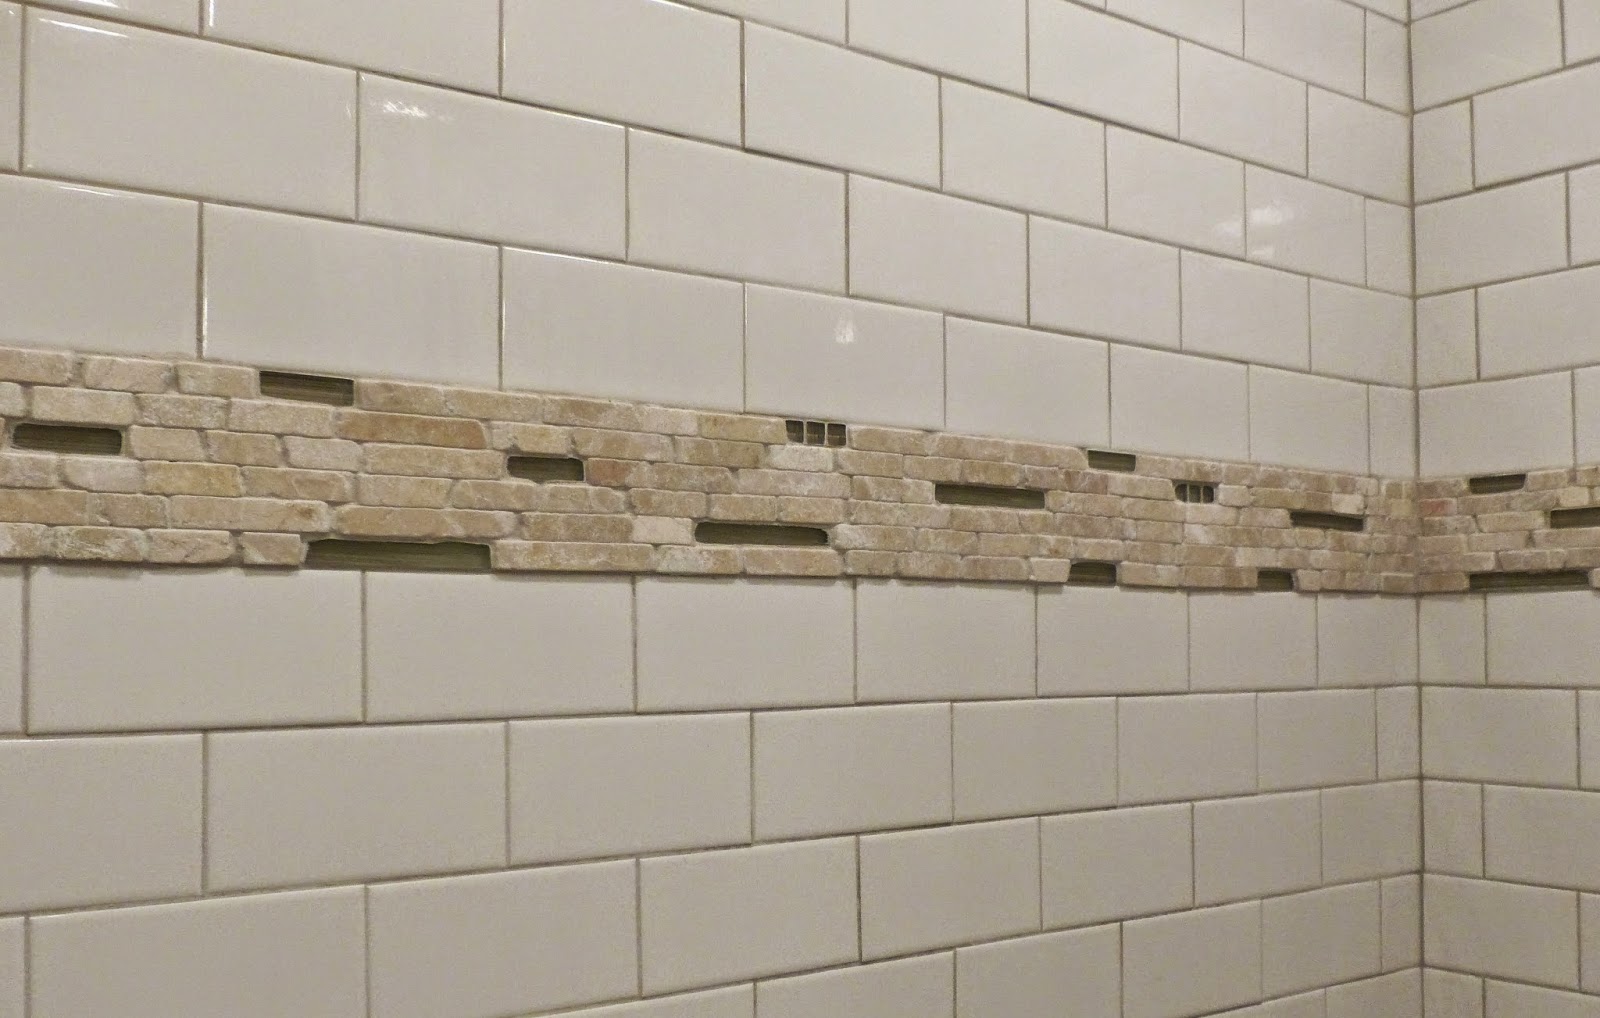
Now about that accent tile… because I had a ton of 12 x 12" tumbles travertine tile left over from our last home and I can be super cheap, I really wanted to somehow use in this project.

It was a bit too traditional looking for me on it's own, so I decided to buy a sheet of glass tile that I found at The Tile shop, pop out random pieces of travertine and pop in a piece of glass tile.

It was a little bit like a puzzle finding the right sizes to fit, but I really like puzzles:)


This artwork is special to me because my grandmother, who is now 96 years old, painted them for me years ago. Well, she actually painted one for me and one for my sister, but I sweet talked my sister into giving me hers:) 


Now the fun part…BEFORE PICS!