PAGES

Sunday, August 21, 2016

BUFFET TURNED INTO A FANCY KITCHEN ISLAND

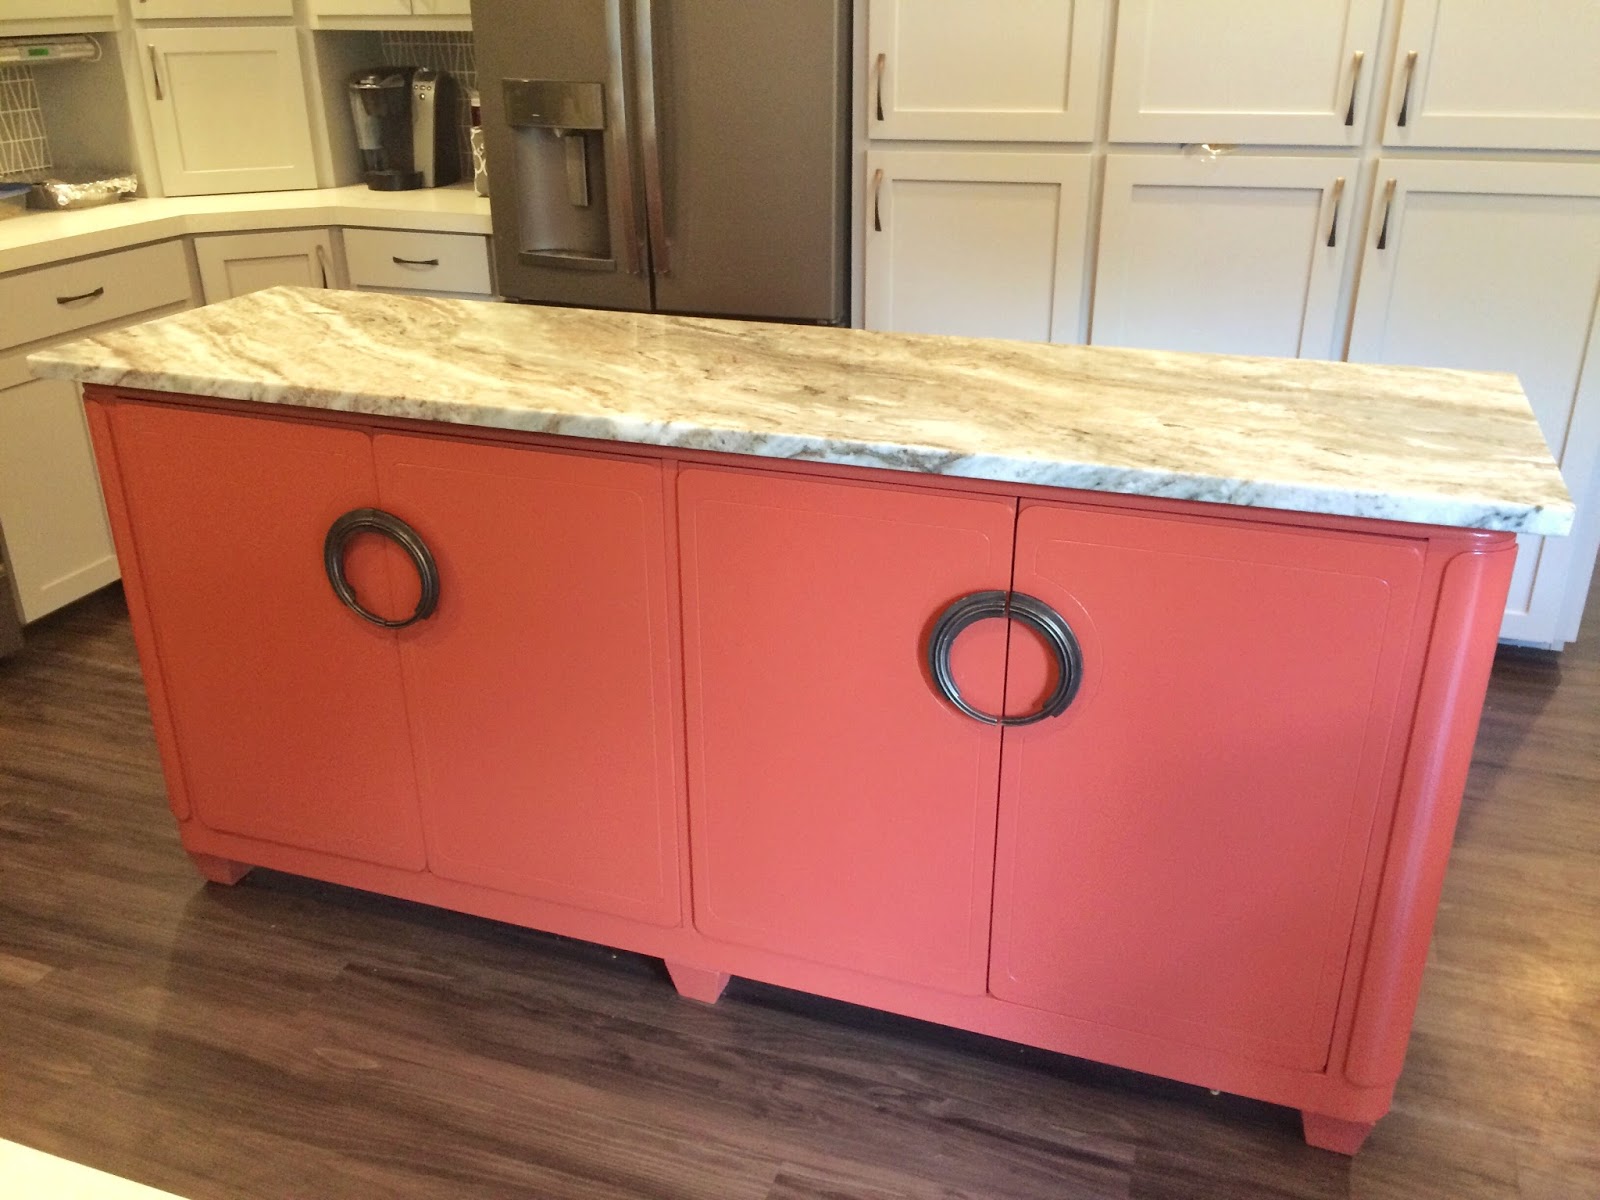
I love the pop of color this island provides in this otherwise neutral kitchen. I have done a few pieces for this client in that past and worked with her designer, Mindi Freng on many projects, so was not surprised by their fun and perfect color choice.   


This piece is a beast...I mean a BEAST!! Seriously, I am freakishly strong for a girl and I was not looking forward to bringing this baby back up the steps from my shop. It's just Marc and I who move all of these pieces so sometimes it can be extra hard. 


Because we needed to add a little height to this piece to make for a perfect island and it was the look my client wanted, we decided feet should be added. 
It is such a long piece and I knew it would be a highly used piece, so I decided to add an extra set in the middle instead of just the typical 4.  
I don't have a photo of how this all went down but I needed to get very creative by adding blocks to the underside in order to attach the brackets needed for the feet themselves. 


The buffet needed a finished back.  She was having her contractor add shiplap to the eating area so we ordered a little extra to have me add to the back. This was really the trickiest part of the entire project because I struggled to not only find the best way to actaully attach it and have it be sturdy, but to have it inset as much as I possible and look purposeful. 


And I think it worked out pretty darn good! 


If the inside is in nice condition and the client is on board with it, I like to leave the inside wood whenever possible. 


Photo booth pictures.  I am never sure I will get those "after" photos from clients so made sure to take these pictures.  I am SO grateful Rochelle took the time to send me a few nice pics:) 


You can see that after my photo booth pics, I did a finish on the to compliment the hardware my client had on her new cabinets.  
I normally cringe at the thought of painting anything brass but because these were brass plated and in rough condition anyway, I was not disappointed one bit by my clients choice and love how the bronze, with little brass rubbed through, looks in this beautiful space. 


Sunday, August 7, 2016

DIY HERRINGBONE PATTERN WOOD TOP


I love all before and afters but when I get to use tools and be creative, it's always a little extra satisfying.

I happened to use old planks of wood that I had been holding onto for this particular top but one could definitely use new wood or pallet boards.  The past few tops I did I happened to use old fencing that my neighbor was getting rid of. 

A lot of work can go into using old wood and for me, I had to use my reciprocating saw to cut the fence material from the posts and pressure wash the heck out of it.  I would definitely do the same with pallets and any old, found wood as well. I also know there are some pallets that should NOT be used because of chemical they are infused with. I would do a little research if your considering the pallet route. 

Whatever you use, you will want to make sure that the boards are all exactly the same width.  In this case I started with slightly uneven 10" wide boards that I ripped down into 3-1/4" pieces to make sure they were all even. 


I think trickiest part of this style top is figuring out where to begin, where that perfect center is.  You would think that you can simply line up the middle of the desk with the middle of the first board's angled cut but unfortunately, with this herringbone design, it's not that simple.


1- Find the middle line of the side your starting on. 

2- On your starting board, make your 45 degree cut and divide the end of that cut into quarters with your pencil. 

3- Line up your middle line on the furniture with the 1st quarter line of the wood. PHOTO BELOW SHOW EXAMPLE

NOTES
**On the last top I did like this, I divided the first board into 3rd's and used the first 1/3 mark to line up with the middle point. I felt that it was pretty accurate as well.  So maybe play around with it a little, do a few dry fits and see what works best for your project**

**Make sure to have some overhang on your first (and all boards) when starting as you are going to need to cut another 45 on the end of the board and don't want to waste any wood**

**It is always a smart idea to "dry fit" and set up a few rows before you start gluing and nailing, just to make sure you feel confident with what's going on**
4- A corner square is VERY helpful and in my opinion, nccessary for getting your first board perfect. All other pieces are only as good as your first piece. So take time to get it right. 

**I clamped my carpenters square to the desk after I got the first board in place.**


After you do a dry fit of a few boards (remember to keep those end cuts long until your ready to cut), it time to make your cut marks. 

In order to get a photo of how I make my mark for the cut, I had to get creative and use my foot to hold the board.  To be honest, these shenanigans happen many times a day:) 

5. After each cut, attach your board and move onto the next. 


6. Any time I do a wood top of any sorts, I always use construction adhesive as well as the brad nails.


7. You really only need 1 or 2 pin nails on each end if your using the construction adhesive.  I promise, after it sucks the boards down and dries, it isn't going anywhere.


Just a photo of how to do a trickier cut, which will happen. 


This tiny cut is an example of what I try to avoid but isn't always possible. Fortunately you don't even notice that tiny cut I had to fill in on the corner and it was the only one. 


8.  To finish off the edges, rip down the board to the width you need, make your cuts, glue, nail and enjoy!

**you don't need to miter the corners of your finished edge but it does look a little nicer**


If you want to or have to use new wood, here is a stain color and technique I like if your looking for an aged, graywash, barn wood look. I did it a few years ago on some shelves I made for my son's room and the tutorial is HERE.


Wednesday, March 9, 2016

GOLD DIPPED FRENCH PROVINCIAL

I have actually been waiting almost 2 years for someone to ask me to do this to a dresser.  I never found the time to do it just "for fun" and knew the motivation was going to come from someone who was paying me to do it.


Can you believe the photo above came from the photo below?  


After prepping and spraying the piece in the color blue, I let it cure for a few days before I masked it off.

To be honest, I was all like..."wouldn't you like it if the ENTIRE drawer was gold and the line NOT running through the middle of it",(ya know, being a big baby about having to masking off the very detailed drawers). And she was like "Hmmmmm...NOPE"!  Can't say I blame her.  Having the line run through the drawers like we did definitely gave it a more special and custom look.

After masking it off, I sprayed a few light layers of the gold paint.  She really liked the color of Krlyon Brass and although I was a little nervous about taking a can a spray paint to one of my pieces, I knew I would be using a very careful hand and clear coating it with lacquer so it would have a very even finish.


So, after saying a few prayers and promising to never have a bad thought again, I removed the tape.

I actually wasn't too terribly worried because I took the extra time to "do it right". I have a tutorial on creating the perfect stripes here.  It is always worth the the extra time because the last thing I to do is touch up an imperfect line on a perfectly sprayed dresser with my shaky hands.

I am proud to say I did not have one touch up that need to be done on any lines.  That will most likely never happen again.


So there you have it!  A few clear coats of a clear, semi gloss lacquer and it looks beautiful!


I also love how the nightstands turned out in one of my my metallic finishes.  My client will be using these as nightstands in a bedroom and the dresser as a buffet in her dining room:)


I also have to mention that my client sent me this gorgeous inspiration photo below.  She loved this dresser by Haylie, who looks to use gold in a lot of her pieces.  She does beautiful work her IG acct can be found here .

I am glad I was able to help my client create a gorgeous piece for her new home!