PAGES

Tuesday, October 29, 2013

ADDING FENCE POST CAPS AS FEET TO ADD HEIGHT AND CHARACTER

I love when a customer wants to use a dresser or buffet as a vanity in a bathroom.  It provides so much character and storage, not to mention that you can have it finished in any color.

Although my job is complete, it will be heading to Texas to be used as a bathroom vanity and will be getting a new solid surface top.  I hope to get those after pictures for you too!


This particular piece was almost perfect.  It was the perfect width and depth, it just needed a few more inches to make it the height the designer needed to make this a comfortable bathroom vanity.

It already had feet on it so that means we needed to change the feet completely.  Sometimes I can do this, but usually I can not.  Glad this was a situation were it would work.


Now would be a good opportunity to mention the design that I am working with on this, and a few other vanity projects.  Her name is Mindi Freng with Mindi Freng Designs.  I enjoy working with her because not only is she an excellent designer and incredibly good at working with adding color to a space, but she is always thinking outside of the box with her designs and keeping it fun by using materials that can be budget friendly and sometimes out of the ordinary, to help make the design unique. 

I happened to have these fence posts that I picked up a few months back.  I always thought they would make pretty cool feet for a dresser and after showing Mindi, she did too.  They are solid wood, very structurally sound and a little different.  Just the bit of 'funkiness' that she was looking to add to this otherwise very simple, plain dresser.


I cut the feet down about 1" to not only make them more appropriate for the height we needed, but to add a wider base to each foot for stability. 

 I wasn't exactly sure what I was getting myself into when I started removing the feet.


 Come to find out they were attached with large dowel type anchors.  


This would be the area the new 'feet' would be atached so I needed to replace the missing wood.

After measuring the holes I ran to Lowes for a long dowel that I cut it down to size.  I added wood glue before pounding into place for a nice, snug fit.


Here it is with 2 coats of primer.


 After I had the piece all sprayed out, it was time to attach the feet.  I noticed that the screws were a bit longer than necessary and if I had started screwing them in, they would have come all the way through the bottom and the drawer would have hit it…not good.


 I took a wrench and screwed it down just enough.


You will want to pre-drill a hole for the posts screw.  NOT too big, but just big enough to guide it in.


And because I'm addicted wood glue (using it, not sniffing it:))…added some to the screw and the base before screwing in.  This baby isn't EVER coming loose!


So again, here is the finished product.  I sprayed the original hardware out in Oil Rubbed Bronze, which looks beautiful with the dusty purple lacquer.


Monday, October 28, 2013

DESK MAKEOVER!

Amazing what adding a fun color and making a few changes can do to a piece.  This desk was completely transformed from a outdated, masculine piece into an updated, darling desk that's a perfect fit for a little girl!


This guy needed a lot of sanding.


 The original backing…it needed to go and I had the perfect solution.  Lowes has 4 x 8 sheets cute 3" wide beadboard that I had them cut to replace.


SO much bettter!  The customer wanted the backing white, just like the hardware.  I though this was a great idea:)


Wednesday, October 23, 2013

ADDING CASTERS FOR HEIGHT TO AN ANTIQUE COFFEE TABLE

I found this pretty coffee table at a second hand store for a customer who I had done a few pieces for in the past.  She loved the size and shape but wanted some color in the room and was wondering if there was anything I could do to give it a little bit more height.

When a piece already has feet or legs, there isn't a ton you can do beside maybe add a 'skirt' to the base and then reattach the feet like we did on this dresser, or add casters.

We did that a few weeks back to add height to this buffet that was being used as an island and I thought it would be a good option for this coffee table.


Feet before drilling for casters.


I measured how long the casters were, put a piece of tape around the drill bit so I could drill down and stop at the correct depth.


I did start with a smaller bit and worked my way up to a larger bit to make things easier.
Holes all done!


I ordered a nice piece of glass to fit on top of the table to help protect the glazed finish because this table will have a lot of feet resting on it and drinks.


Monday, October 21, 2013

BUFFET TURNED BATHROOM VANITY

I had the pleasure of helping a client transform this darling buffet into a bathroom vanity a while back and finally got the 'after' pictures!  


She had been on the hunt for the perfect size buffet to use as a vanity.  There are plenty of buffets out there, but most of them are pretty long, which wasn't an option in her bathroom.  She needed one that was a bit smaller than normal, something that isn't really easy to find.  

Glad I had one that was the perfect length for her. The top was pretty rough and I knew when I purchased it, that it would need some extra work.  

Imagine how excited I was when she asked me to remove it because she was going to add a solid surface to the top!!  


There were a few tweaks we needed to do to make this vanity work for her space.  First of all, the middle rail was a bit wrapped and not as sturdy as I would want it to be with 4 kids jumping up on it to brush their teeth.  I alway work on a piece, especially one that is going to be a 'fixed' piece in a customers home with the thinking…'what would I want in my house'.  That way I feel confident that they are getting a great, solid and lasting product.

Marc removed the old rail, routed a nice edge on a new 1 x 2 and installed it into place.


We also needed to cut down the piece to a certain height.  No options for an "oops" on this part!


My client wanted the entire inside of the cabinets sprayed out as well. I would too.  She would be looking in it many times a day…it needed to be as pretty as the outside.


I did one of my metallic finished on this piece.  She did NOT want any gold, just a darker, metallic look. I also sprayed out the existing hardware in a oil rubbed bronze finish. 

Although I hated to let this one go with 'incomplete', my job was done and it was ready to be installed and wait for the top.


Didn't she do a beautiful job on her bathroom renovation:)  The wall color is called 'Dill Pickle by BM.  The tile, lighting, mirror, top, sink and everything came together beautifully!


Monday, October 14, 2013

TACKLING THE TANNIN BLEED THROUGH PROBLEM…WITH SHELLAC!

Many types of wood that I work with have tannins that will bleed through and nothing is a bigger pain when I am on a roll!  Typically an oil based primer will do the trick when my lacquer binding primer will not. but sometimes I need to take a different route.


Here is a perfect example of how the tannins of this wood are bleeding through my oil based primer and topcoat.  95% of the time the stain blocking primer Kilz will take care of this for me but not so much this time...


Although not quite as cost effective as the quart or gallon, I usually buy the cans of Zinsser Bulls Eye Shellac and hit all the areas that are bleeding through.  

I believe that most people do not prime and probably go straight to the paint, but I always feel more secure with priming and THEN using my topcoat.  I am an overkill sort of girl when it comes to my custom pieces.  Last thing I ever want is a customer calling me after a few weeks or months telling me there are little pink dots coming through their pretty white dresser!

I love my customers but the only time I want to see them again regarding furniture is because they loved their piece so much and want me to do another one for them, not because something is wrong.  So I continue use my trusty 'overkill' techniques:)


Tannin free and lovely!  This is going into a nursery as a dresser/changing table combo for a sweet baby girl:)


Isn't this pink bubbly glass hardware gorgeous!  My customer bought it from Anthropology and brought it to me to install.


Love the chevron liner she picked up for me to put in drawers for her.

Tuesday, October 8, 2013

VINTAGE BEDROOM SET MADE PRETTY!

I REALLY love how how this bedroom set turned out but…. 


have I mentioned how much I hate stripping painted furniture?  Stripping paint is NO FUN!  It is definitely more work than stripping a clear coat or stain.

I had a lovely customer ask me to refinish this set for her and although I did see the pictures she emailed me I had no idea it would be in such 'rough' shape.  After going over my concerned about the set and the fact that I was worried I would not be able to get that PERFECT finish I typically do, she was still on board and gave her blessings to move ahead.

Hard to tell what I was in for from these pics…


At first I was determined that I could just sand the heck outta this guy and make all my problems go away.  I quickly learned by problems were just beginning…


Durning the 3rd layer of stripping


what a mess!


gross!  Feeling sorry for me yet?!?!


Everything about this dresser was just so very wrong!  UGH…had 95% stripped off and realized I was only half way done.  I had to sand the paint off the side of the drawers too.  

No way I was going to go through all of this work and have it still look horrible when she opened the drawers!


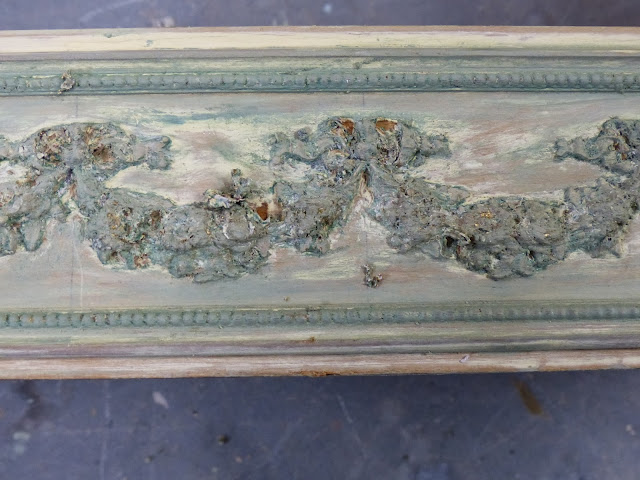
There was not a ton I could do about the decals.  Turns out they were made of clay and too much digging would totally ruin them.  

I found that the best thing to do was to let the stripper dry most of the way and then take a wire brush and brush most of the stripped out.  That way I wouldn't ruin the detailing.


So anyway, after a few days of working on this set and particularly, the tall piece, I am very happy with the results.
My customer loves how it turned out and really, that is all that matters to me!