PAGES

Tuesday, March 11, 2014

MCM DRESSER TURNED TV CONSOLE

The top of this guy was laminate and the box was a bit beat up.  The drawers however, were in wonderful condition, making this a great candidate to strip and re-stain, creating a fun two toned look.


After removing the back and rails, I cut a piece of plywood to fit snuggly inside.  Using construction adhesive and a lot of weights to glue it down, I let it sit overnight to make sure the glue it is good and dry.

Leaving the back off while refinishing and spraying is best because it makes it a little easier to get the inside sprayed out nicely as well as the inside back, the part you will see from the front, painted as well.


 LOVE!


I pretty much have this project down to a science and actually enjoy converting these pieces into a functional, fun and beautiful TV console.


Running a bead of caulk along the front and sides then touching up with the color give the piece a nice, finished look.


Thursday, March 6, 2014

DINING ROOM MAKEOVER AND ANTIQUE MIRROR TUTORIAL

I have not been good about sharing the updates that I've done to this house over the past 3 years.  We really have done a lot of things to make this house as pretty as we can, on a budget.

I guess after building a few beautiful homes I felt that the updates to this house were insignificant but actually, this has been a very humbling process and much more challenging that starting from scratch.  

After being on both ends of the design spectrum, I think it's much easier to fall in love with a brand new, big fat daddy house made all new and pretty.  If you want a real challenge, lets update a really outdated, ugly house on a simple budget and fall in love with that!

I have shared my master bedroom update as well as the master bathroom but really, no other areas of my house.  

Lets start with the dining room.  Here are a few 'before' pictures.

Pretty sure these drapes had been hanging here for over 50 years.  They were so nasty and dirty!
Notice the baseboard radiators? Yeah, they ran almost the entire length of every room in the house and had dirt marking up the wall about 3 feet. 
  
Removing those and getting forced air was one of the first major things we did after moving in. 


I worked hard to keep that room divider intact even when all the drywall around it was ripped down and replaced.  Pretty much threatened everyone who was working in that room with their lives:)

Check out the chandy!  I really did love that light!  It hung there for a few months but as much as I loved it, it didn't fit the style of the house or the look I wanted for the space.  I sold it. But truth be told, I still think about her now and then.


Yeah baby!  Check out all that yummy paneling!  Maybe this is the part that made the other 100 potential buys go running out the front door.

Notice the big bow in the upper cabinets of the hutch?  I ended up literally jacking it up, placing 1x4's in the back (over the thin plywood I faced it with) and calling it good.  Very well placed trim at the top helped hid the imperfection at the top of the cabinet.


Since then, we have removed the paneling and replaced it with drywall as well as replaced a 22' beam that spanned the living room.  With each room or section we renovate, we also update the window.  We actually replaced the large window with a sliding door for easy access to the back yard.  

We also removed the nasty carpet and added hardwood flooring. Knowing that a kitchen and den reno were in our future, we purchased enough to run it through those areas as well.  With my luck, this flooring would have been discontinued by the time we got to those rooms and didn't want to take the change.


We removed the paneling and drywalled the living and dining rooms.  Although we may be removing and replacing this hutch with new cabinets when we do the kitchen, I love the little update I did to it.

You can find the antique glass tutorial HERE.


Although not a high end built in, it has served it's purpose well as a great storage and craft area and the obscure glass hides all the paperwork that we store on the top.


This dining room might not be a fancy as the one in the home we built 10 years or...
 
or the one we built 5 years ago.  But that's ok, I am getting there!


Tuesday, March 4, 2014

STARBURST LIGHT MAKEOVER…FROM AWESOME TO MORE AWESOME:)

I had my eye on this light for a few weeks. Every time I went to Lowe's, which is 1-2x a week, I would  swing by the lighting section and visit the light.  I didn't NEED it, but I really WANTED it!

As perfect as it was in it's original chrome finish, I have a lot of gold finishes going on in this 60's house and wanted the light to be in a gold finish as well.


I taped off the inside of the light sockets.  All 18 of them.  Not only because I wanted it to look nice and professional, but it's the safest thing to do.


Hanging in my spray booth ready to get sprayed.


I used a red primer for metal by Rustoleum.  I used red only because that is what I happened to have, white primer would work just fine.


This sucker is BRIGHT and I LOVE it! Pretty sure my electricity bill is going to go up…we are going to have to add a dimmer:)


I love the bulbs that came with it too…such a fun and funky light!


Monday, February 24, 2014

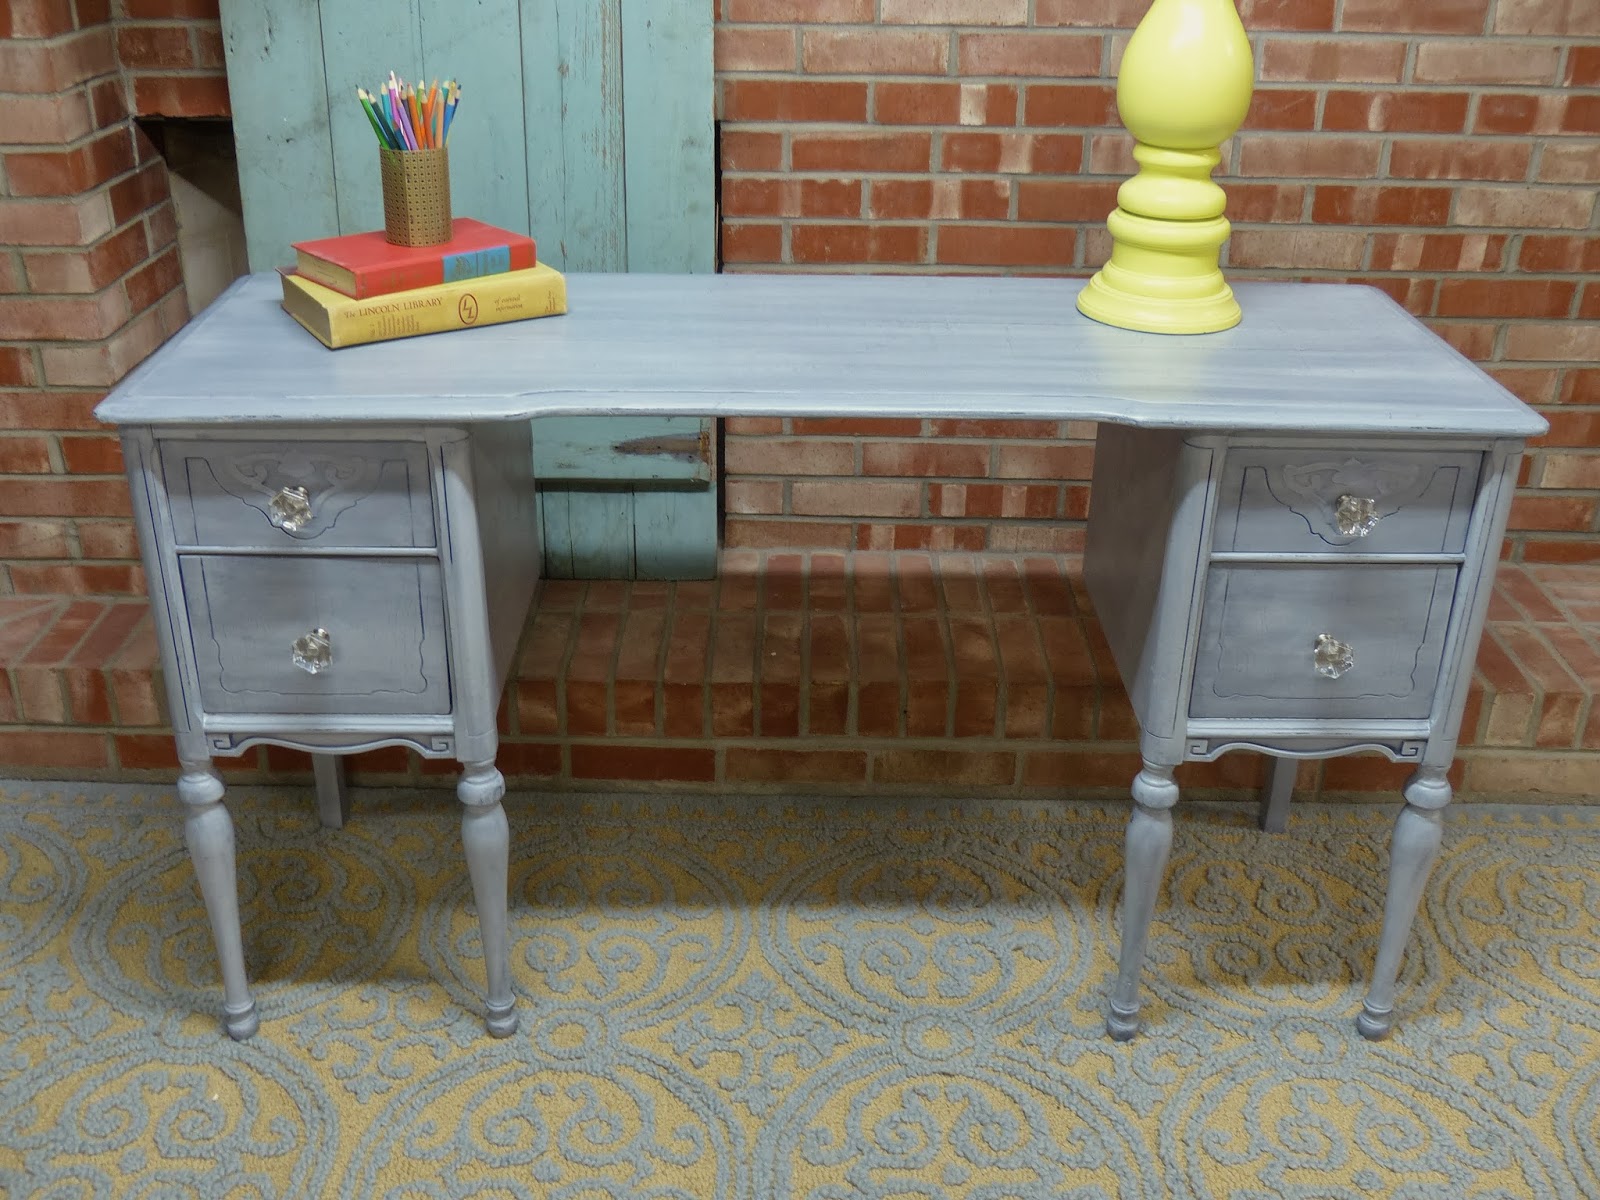
ANTIQUE VANITY TURNED FUNCTIONAL DESK


She turned out wonderful buuuut….


I will be honest, I was a wee bit concerned about this piece. 
I knew it was solid and well put together.  It had lasted for over 60 years and is going to last another 60 but it was on the "rough" side.  

Even so, I loved the sweet, simple detail and knew it would look beautiful with the right finish:)


Originally this piece was an antique dressing vanity.  But really, how often do we sit, gazing into the mirror and run the brush through our hair 100 strokes? Not happening often over here and I wanted to make it a function desk.  

I took it apart months ago and let it sit on the sidelines until the perfect top came along.  


Alas, this buffet top was available when I needed to remove it to make this piece into as a bathroom vanity for a customer (which was a pretty cool project and you can go HERE for details).

**side note…this is the first time I have ever used the word "alas" and am not sure how I feel about it**


I do love how it turned out:)  
I have never done a "colored" glaze before but the customer wanted a navy glaze over the gray/blue base.  


I mixed the glaze myself with 50/50 navy acrylic paint and SW clear glaze.  
I love how the dark glaze fell into the tiny cracks and imperfections of this piece.  


Saturday, February 22, 2014

MASTER BEDROOM MAKEOVER

**First let me start by saying that I am NOT a designer (or photographer), nor do I pretend to be one. So if "design rules" are broken, no judging:)

I have a fair amount of color going on in much of my house so really wanted a softer, "tone on tone" type of look for this room. 
I am super lucky in the fact that Marc could really care less about what I do, as far as decor goes, in our home.  Not only is he pretty much color blind, but he knows I will do what I want to do anyway, so why argue:)  Hence, the "blush"tone of the quilt... I LOVE that man!


Here is a before picture of your bedroom.  It was not bad, I was just ready for a change and had been wanting to do something different with this bed and nightstand set that we've had for years.


I really love this metallic finish.  I am starting to think that every room of my house needs it somehow!  Check out my post on how to fix floppy, sloppy shams here.  It works beautifully and wish I thought of it years ago!


The bedding was purchased from Target and I bought the lamps from Hobby Lobby.  I had my eye on these lamps for over a year and so excited to finally have a reason to buy them!


Finding bedding was as difficult as finding the wall color!  I bought and brought home 3 different combinations before I picked this one. 


I painted the nightstands in SW-Cotton balls. It is a nice, soft white and the same color as the trim throughout my house.  


 The curtains I found at BB&B.
I purchased the rods from Target and sprayed them in Rustoleum Pure Gold.  


Mini me helping iron the curtains.  She actually did a pretty good job!


I bought this wall art from an estate sale last year that I had forgotten about.  I was super excited to stumble upon it when I was working on this room.

 Love how fancy my curtains look when the heat is blowing!  Go here to see the post on our master bathroom reno we did back when.  Still one of my favorite bathrooms we have ever done.


I do not know the color of the walls because I mixed a bunch of colors together to get what I wanted after realizing I couldn't find it on a color strip.  I would say it's closest to BM Gray Owl with a few LESS drops of blue.


Now to be honest and show you the ugly bench at the foot of my bed. I have dragged this guy around for years.  It has been outside in 2 homes, in mudrooms and now in my bedroom.  Until I find a pretty dark gray little tufted sofa (for under 8 million bucks) it will stay at the foot of my bed:)


FANCY UP A CHANDELIER

I love how this little project turned out! 
I could tell from my clients personality and what she wanted to do with this chandy that she was fun and creative and it shows in this photo of her beautiful dining room she sent me.


I was pleasantly surprised when she brought it to me with the areas she did not want sprayed, already taped off.  Saved me a ton of time.  
She purchased this from World Market


This was a bit challenging.  You would think, "oh, just spray it", like I did at first,  but quickly realized to get a NICE and EVEN spray, each bead would need to be 
 slightly rotated with every coat.  
The beads had a coat of clear on it that repelled the Krylon Ocean Breeze blue spray, so it definitely needed to be primed first.
This little guy spent 2 days in my spray booth getting hit whenever I remembered:)


My customer glued the glass stones on herself.  I LOVE how this turned out!

Wednesday, February 12, 2014

QUICK STAINABLE FILLER OPTION

I posted a question on my FB page the other day asking if anyone had a truly good stainable filler.  I have tried a few of them and have yet to find one that works well.  

I actually find that sometimes I am best to just leave a scratch or knick alone and once it is stained, tends to stand out less than if I tried filling it.


But these guys, I wanted to fill...


A lot of the answers were to mix some of the sawdust from the piece with glue.  I have known about this method and tried it a few times but it never worked like I was hoping.  And maybe it was the glue I was using that was the issue (Elmer's).  I have also used minwax wood putty with some success and would have been a good 'after staining' option.  I would mix a bit of a few colors to get the tone of wood I was working on. 


Because I know wood filler dries hard, I thought that I could try adding the sawdust to that. 

So I got me a bit of Elmer's filler and dabbed in into the pile of sawdust on my dirty floor

After mixing it together, I filled in the small gaps on top of the buffet.

(BTW…No, I wasn't jumping up and down when I took these horrible phone pics, I'm just a very bad photographer:))

 Then I grabbed more sawdust off of my dirty floor and packed it in good!

After letting it dry overnight I sanded it down very well, getting as much of the filler that was on the wood, surrounding the scratches, off the best I could.

When I do this again, which I will, I will definitely take a bit more care in trying to keep the filler off of the wood because the filler itself doesn't take the stain, just the sawdust crammed into it.

After 2 coats of General Finishes Java Gel stain, I think it looks pretty good!