PAGES

Monday, March 25, 2013

ADDING HEIGHT TO DRESSERS IN 2 DIFFERENT WAYS!

I love being able to tweak a piece a little bit and make it work for a customer.  For example, I had these 2 pieces that my customers wanted for their bathroom.  Not to be used as a vanity, although we are still looking for the perfect piece, but because they have two dormers in their bathroom which were serving as wasted and they wanted to add these in there for extra storage. Brilliant!


These 2 pieces were exactly what they were looking for in style, storage and length but neither were tall enough for the space they wanted to fill.

For this guy, we added feet using a similar technique as below with the 4 x 4" blocks.  I did a (semi) tutorial about adding feet a few weeks ago, but that was MY method and although it very sturdy and worked great, Marc has since taken over the feet adding business and has a more efficient way of building it.  I guess we are both control freaks when it comes to certain types of projects:)

I promise to do a better and more detailed tutorial on adding feet in the near future as I have a feeling I will be getting more requests for it.


On the piece that already had legs but was still too short, were were in luck.  This guy had the feet attached to the base. Seen here again....


After taking off the back to be able to get at it better, Marc cut about 4" blocks.  Basically whatever length you cut, you will just need to make sure that all 4 legs bases are exactly the same dimension and  that the trim board or "skirting" will cover it completely. There are different widths of trim board. We used pre primed baseboard that happened be leftover from our bedroom/bathroom remodels.

He screwed the 4 x 4" feet base in from bottom and inside.


Then added a piece of wood in the front as framework for extra support for the trim board to attach to.


ready to get sanded!


Love how this turned out!  Looks like it was made like this.  Happy customer :)


This guy turned out great too.  Love what adding feet can do to change the entire look and the added height is great in some situations.


Friday, March 22, 2013

MC DRESSER WITH 2 TONE LOOK!

It's fun to do different techniques and color on pieces to make it more customized.  This piece in particular was a perfect candidate to make the base/legs a different color.


This darling piece is for a baby boy's nursery.  She wanted the base white, original hardware white and the trim on top drawers white.


Before I did the body color, I sprayed out the base/legs in white, let cure for a few days and then taped off the base well so I could do the body color in the blue.


Definitely a mistake not to use my BFF...frog tape.  I was out and being lazy.  The masking tape had a little bleed through and I ended up having to do touch ups.  I don't like touch ups!

Wednesday, March 20, 2013

CHEVRON DRESSER AND MY LOVE OF FROG TAPE!

I will admit that although I was excited to do this dresser, I was a bit nervous as well!


Not only is a little tricky to get a very even pattern and perfect lines when it is on a solid piece but applying the stripes onto drawers that do not necessarily line up PERFECTLY and have them going in opposite directions...I was ascared!

The very first thing I did was make sure my customer and I were on the same page as far the the stripes go. We had a few ideas going back and forth and the last thing I wanted was to not do what she wanted.  No easy "do overs" here!  I did a few drawings, emailing them to her to get her blessing.


I did was remove the blocks that pushed out the middle drawer a bit.  Love the bumped out look but it was going to be easier to have the drawers flush.


Because the drawers, although very nicely lined up, were not PERFECTLY lined up.  I couldn't simply take them out, set them face up on the floor next to each other and go to town on the lines.  I need to keep the drawers in place to make sure the lines were perfectly lined up when the drawers where actually in place.  It was amazing how an 1/8" off would completely ruined the look.

Naturally, I do not have a good description of how I accomplished this task mainly because as with so many projects like these...you kinda learn as you go.  But I will note that after I got the top drawer perfect, I then went to work on the bottom drawer which was going to have the lines running the same way.  I used a straight edge to accomplish this by lining it up with the top drawers lines (top and bottom drawers in place) and marking very lightly on the bottom drawer where it lined up perfectly.  After this, while all 3 drawers in place I did the middle drawer, with lines going in opposite directions from top and bottom by eyeballing and making tiny marks on top and bottom where the tap would line up.  

I used a piece of tape as the template to keep width evenly.  Just thought it was the smartest and easiest way to go about it in this situation.  Luckily the width of the tape was perfect for the look I wanted.


Remove and go onto the next one!


There....all lined up.

I truly don't think my lines would have turned out as perfectly as they did if I did not use the green frog tape.  TOTALLY worth the $800 a roll!  Then, like you would want to do to make any perfect painted line, I painted with a foam brush along the tape lines and then sprayed it out in the white first.  This way any paint that is going to sneak under the tape...and it WILL sneak under the tape somewhere, is going to be the white color and not the color you DON'T want to sneak under.  I didn't have to do one touch up with this technique!


After the white dried I then sprayed on the color I wanted.


Doesn't my customer have a beautiful entry way?  LOVE the front door!  I also sprayed out the mirror in the same color as the stripes.


Thursday, March 14, 2013

TIFFANY BLUE AND MINT GREEN!

ARE YOU KIDDING ME?!?!  I really love this new piece!  I am not exactly sure of the color because a customer of mine mixed it up with acrylics and we color matched it but its a cross between a tiffany blue and robins egg blue, just enough green to keep it from being baby blue.  The hardware is from Restoration Hardware and something my client has held onto for years.  Glad she was finally able to use them!


We used a high gloss lacquer to give it a more modern feel.


Can you believe this before picture....Love to transformation!

Tuesday, March 5, 2013

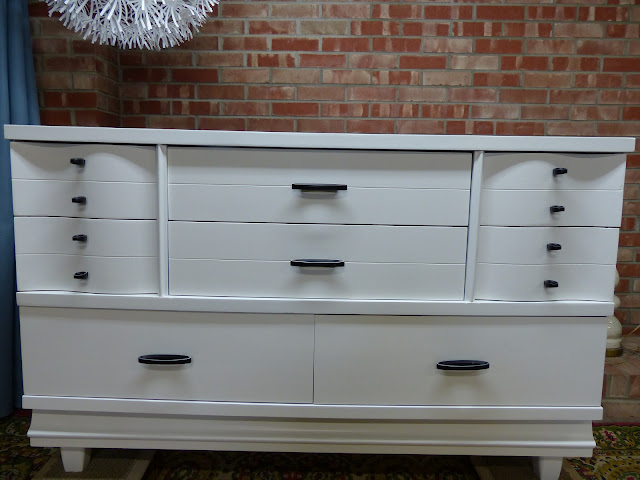
CAN'T GO WRONG WITH WHITE!

I have been so busy with pieces lately and trying to keep up.  I have a few great kitchen project to reveal and yes, I know I still need to get my mom's "after" pictures up!  I HAVE to get over to her house and finish a little tile work before I take pictures.  SHAME ON ME!!

Although I have love working with color and have a bunch of fun, colorful pieces to post about and add to my portfolio, I just want to share a few great projects recently done in shades of white.  If a customer wants a creamy off white, my "go to color" is always SW- Creamy.  I love this soft, creamy white.  It looks great on every piece and any hardware looks beautiful with it.

Here is vintage buffet in Creamy white with glass knobs.  Love how this is very detailed and antique but we did a very modern seamless finish


This bedroom set looks beautiful with the original vintage hardware and modern finish.

I cleaned the hardware the hardware but didn't want to take off the original finish. You have to be careful sometimes to not strip off all the finish unless you WANT to.


If you are looking for a white, but not too as creamy as the "creamy" and not a stark white, I love BM-Cotton Balls.  Perfect!