PAGES

Saturday, November 17, 2012

USING FINIALS AS DRESSER HARDWARE

I just finished this dresser for a customer and she was really interested in finding big fat ornate hardware...under $30 a piece. There are great pieces on line and at higher end hardware stores, but they get pretty pricey.  This might not be a problem if you only need one of 2, but 6 pieces, that can get a bit expensive.

I suggested looking at curtain rod finials, as I know they can get pretty big and funky.  Naturally, Hobby Lobby had just the piece she was looking for.  I simply found hardware screws large enough to fit the existing holes.


I also love the green olive color with brown glaze on top.  Completely changed the look of this piece!


Oh my....

Monday, November 12, 2012

NEW DINING TABLE AND CHAIRS SET

(SET IS SOLD)

I am just finishing up a project that I didn't really have time for, but just wanted to do because I KNEW how much crazy awesome potential it had!

I was actually going to bring it upstairs and do by photos with it staged in my dining room and thought that probably would not be a good idea.  If I set it up in there, I don't think I would be able to take it back out!!! SOOO PRETTY!


The before picture. They definitely needed some love and I got lots of love to give!


After the fun job of stripping the top, I put a couple coats of walnut stain.  I didn't want it to be too dark and blend in with the black base and chairs, but rich and pretty.


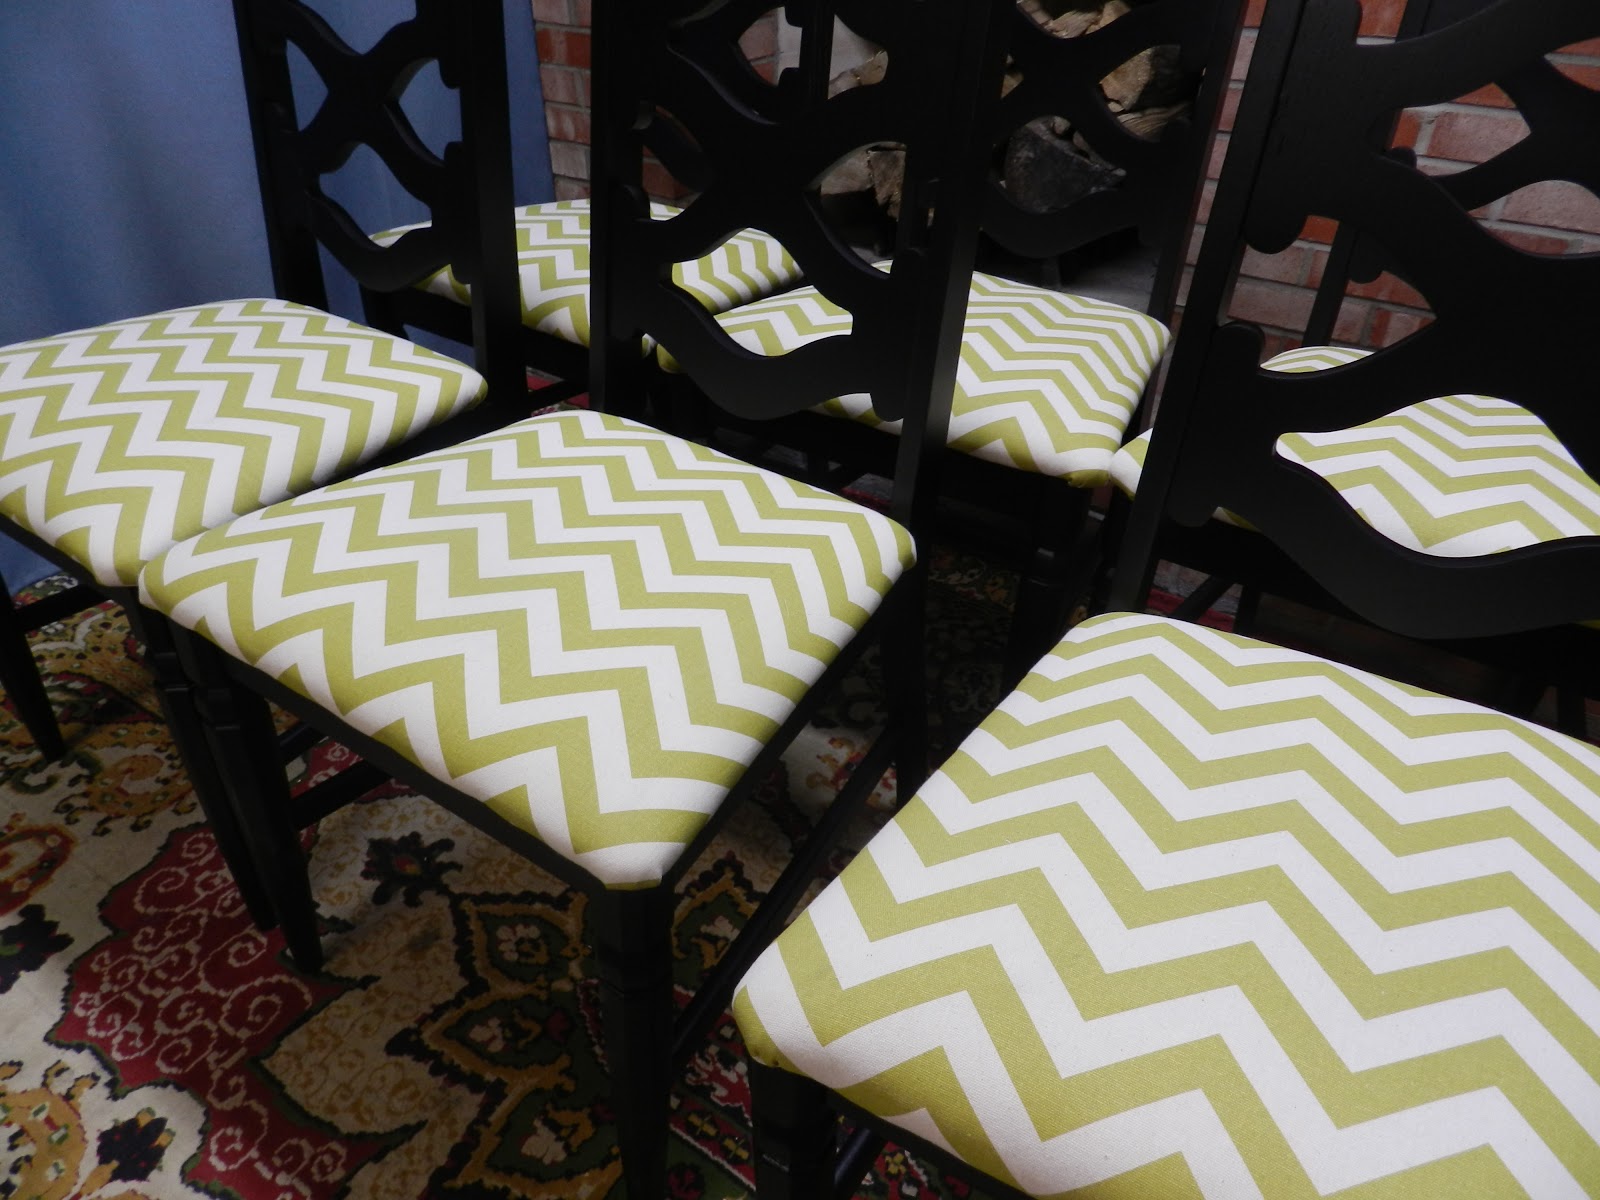
I really can't stand how cool these chairs are! So unique.  No way you will find about set like this. I knew I wanted a fabric with a pattern but because these chairs have so much detail, it had to be a pretty simple pattern to not compete too much.

Who doesn't love a classic chevron fabric?!?


Friday, November 9, 2012

COVERING UP A TRICKY FIXED PIECE ON YOUR FURNITURE AND MY NEW FAVORITE COLOR!

First I have to tell you how much I am LOVING this color!  This color is SW- Centenial Gold and is much deeper and prettier than these pictures show.  But because I obviously suck at using a camera...the color looks substantially lighter.  But still pretty!

This was originally an old radio cabinet and really has nice storage inside.  I believe my customer is going to use this to keep the towels in by the door leading to her hot tub...such a great idea!  

Love the turned legs and detail. 


Here is the before picture....BOOORING!


Here is my little "tip" for the day:)  When you have a fixed piece, such as this emblem that is on the inside of the cabinet door or any item that is not easily removable there is an easy way of covering it nicely.


  Simply put a layer of tape over the top, sealing the edges well.  Take a VERY SHARP razor blade (a dull one will just pull the tape) and cut along the edge.


Not rocket science, but hope it helps someone:)


Thursday, November 8, 2012

THE PERFECT RED!

Red is super hard to get perfect.  Sometimes it can be too orange/tomatoeish, or maybe too bright or dark.  Unfortunatley, I have no idea what color this red is because we did a color match to an object without a color "name", but I would say that is is closest to SW-Stolen Kiss.


Nothing is better than a good "before" shot (which naturally,  I forgot to do for the nightstand). 

The nighstand is not actually an exact match to the dresser, but my customer did a little hunting and found a pretty close match.  I think she did good!

The existing hardware had to go...in the trash!  My customer was originally thinking of the classic cup pulls that are on the top drawer, but after seeing the pieces sprayed out, we thought a dark, rustic color would look best to go with the look she was shooting for in her sons bedroom.


These were found at Hobby Lobby and if you can get them 1/2 off, it's a great deal.  I love this hardware, but unfortunately the "rustic" nature of them tends to not have the holes PERFECTLY lined up, making for scarry hardware installation!  No wine for me tonight!  I need to THINK!!!!!


It's amazing how a boring traditional oak set can turn out so modern and beautiful! LOVE everything about it!


Monday, November 5, 2012

MY FAVORITE WOOD FILLERS AND TIPS FOR BETTER RESULTS

I have used a lot of different fillers, trying to find the miracle product but always go back to good ol' Elmers wood putty.  I am not crazy about the terrible NON air tight lid, but overall...it's a good product.

Because the lid is so bad I sometimes put a few drops of water inside before I put on the lid and use a rubberband to keep it tighter, but the best tip...just buy the small containers and put it in one of your own nice air tight containers.  Lasts MUCH longer.


This is another product that I really like too.  A few months back I was standing in the "filler" isle at Lowes and stuck up a conversation to two of the nicest old men who have been refinishing for years.  You can learn so much from older people who have years of experience!  And I love how they usually stick to the old school methods.  
These gentlemen highly recommended this product, Durham's,  for filling in deeper holes.  I LOVE that it will never dry out and that you can mix up as much or as little as you want.  I almost ALWAYS add too much water, but that's ok...just add more powder!  I think what I like most about it is that I love making little concoctions:)  I usually make too much and when I do, I run around my shop patching up everything I can see on other pieces that might need it too.  Hate to waste it. 

So remember...A LITTLE water and a LITTLE powder goes a LONG way!

Because this stuff dries FAST and HARD! It is perfect for that first coat of filling in old hardware holes.  I always to do a good first coat of this, getting it deep into the holes, not worring about it looking good yet, and let it dry, which does not take long.

I have learned that there is no sence in trying to get the holes filled in perfectly with one coat of any type of filler. It usually sinks in a bit or has air holes.  Best to accept the fact that it is a two step process and do it right.


After I let the Durham's dry, I do a nice, light coat of the Elmer wood filler, leaving only a little mound.  The less of this you use, the faster it will dry and the easier it will be to sand smooth.

Awesome results!

I had heard a lot about the product Bondo.  I really wanted to like it.  But I just don't:(  For me, it dries too fast and I find it is VERY difficult to sand out and doesn't give me the result I am looking for.  But it is fun to mix!


Another tip that might help...I like to use a straight edge of some sort (scrap wood) when filling in an area that is on an end or edge.  Just butt up the wood to area that needs filling and use to keep the filler nice and even.  Elmers (and not Durham's) works best for edges because Elmers is less brittle.

This nice clean edge is easier and faster to sand out evenly.


Thursday, November 1, 2012

MONEY SAVING TIP...MASKING TAPE!

Seriously, how would you DIY'ers even get through your day without knowing these awesome tips I share with you?!?

I can't believe I didn't start using masking tape to tape off all my drawers and cabinet openings until just recently.  I was spending SO MUCH MONEY on blue painters tape and having serious "sticking" issues with it all along.  Nothing is more frustrating than to walk down to start working the next morning and seeing this...


So a few weeks ago while heading to Homey D to buy a few $800 rolls of blue painters tape I was noticing how much less the masking tape was, only about $400 a roll.  And the masking tape has "strong" adhesive as opposed to the "medium" strength like the blue tape. DUH!!! It's not like I am actually using this to make a PAINT line, just want something to stick!


Another life saving tip.  If you pull it off nice and slow, you can reuse a lot of the paper on the next set of drawers:)


Friday, October 26, 2012

THE FANCY FRENCH PROVINCIAL MAKEOVER AND HOW TO ANTIQUE YOUR OWN HARDWARE

There was A LOT of fun stuff going on with this project!


My customer was looking for a new bedroom set (nightstands are in the works). She knew she wanted the french provincial style, with a creamy base, light distressing, glazing and a dark stained top.  The challenge was finding 2 large pieces, that she liked and that were a set.  We never did.  What I decided to do was pair together 2 very similar pieces, using the same paint techniques, try to match the different wood tops the best I could and cross my fingers I could come through on my promise.

You can see in the before that these are SO CLOSE in style and shape.


She really like the gold finish by Valspar that I had on my hardware sample board.  If you know me, you know I love my fancy gold finishes, but after spraying the hardware, it just looked to...new!  I got her ok to "antique" it a bit by using some of the burnt umber acrylic paint.

Below is the difference. 


So being the professional I am, I just squirt some right on my newspaper and went to work.  I made a new discovery along the way...spray paint makes an excellent nailpolish.  You can see on my thumb the gold I used.  It took a LOT of scrubbing to get that off!  God forbid I walk 3 feet to my workbench for gloves.  I'm a busy girl!

Any brown will work just fine.  just brush it on, getting into the groves and with a dry rag, wipe off as much as you want.  Seal with a protective clear coat when done.

 Much better:)


Wednesday, October 24, 2012

DESK RENOVATION

I come across some pretty cool desk but I am not sure what the deal is space where the chair goes...did everyone 70 years ago topped out at 5'0 and 80 lbs?  They can be so DINKY with Zero leg space!  I am pretty sure I am not the only one who doesn't like to feel claustrophobic when sitting at a desk.

So either they can now be used as cute little accent pieces for storageor only used by kids.

This desk is a perfect example.  Cute, great lines, nice drawer space...little leg room.


Now here I am, all dressed up nice and pretty, trying to sit at this desk...not so comfy.  I decided that 6 drawers were enough and the middle one had to go!  Would rather have one less drawer than a very uncomfortable desk.


There now, that wasn't so bad.  Little patching up, sanding followed up by a good refinishing job and it's like new:)

Saturday, October 20, 2012

DIFFERENT STYLES, BOTH BEAUTIFUL!

I definitely have an eclectic style.  I think you have to to really enjoy this job with being able to see to beauty and potential in all the different styles that you come across.  Take these 2 new pieces for example...both could not be any more different is style, but both gorgeous.

 This sweet feminine French Provincial piece is for a customers daughter's bedroom.
Sprayed in a classic "creamy white" by Sherwin Williams and hardware is in one of my favorite finishes, rustoleum "champagne".  This is a great soft metallic color and a good cross between gold and silver.  Goes great with almost any color.


This Mid Century modern piece is going to used as a TV Console for a customer.  Love the nice clean lines.

He chose black hardware to match the other hardware in his home.  Looks masculine and perfect!