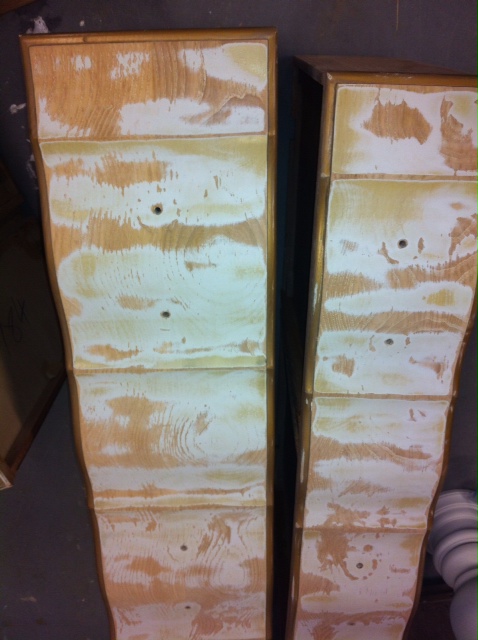
All those spindles and swists and turns! It's not really the sanding that makes it so challenging (although time consuming), it's spraying them just right to get into all those angles and turns without overspraying and creating runs. Lots of light layers!
They turned out beautiful! I hope my client is happy:)
Here is the before, in my sanding booth. Used a combination on a hand sander and a lot of elbow greese. These chairs were solid and you can see the potential.
Thursday, June 28, 2012
Tuesday, June 19, 2012
MY FAUX ZINC TABLE TOP AND REUPHOLSTERED CHAIRS
I didn't have time to do this but it HAD to be done! Wish I had before pictures of the table and chairs but naturally...I don't:( Just know that the paints and craft items my daughters use on this table have RUINED it. Who knew acrylic paints could be so damaging.
I am pretty realistic when it comes to furniture and kids, wouldn't spend a ton of money on a table or expect it to not get dinged up with kids around, but I draw the line at "gross"... and it was super close! When my son had a friend over the other day and went to eat lunch at the table I heard him say to his friend "um, yeah...lets go eat at the other table"!! He was embarressed! Not cool.
Originally I was thinking about stripping and re staining the top but didn't love the table enough to do all that extra work, so my quick fix solution was to do a faux zinc finish to the top.
After sanding it down, it still had a black/dark base from the original stain, which is what I wanted. I used the technique that I did on my faux zinc letters tutorial and applied it to the top of the table, going back with a few different tones until I got the desired look. Then sealed it with 3 coats of a lacquer clear coat.
Since I was on a roll, I decided to reupholster the seats with some left over fabric I had and loved from another project. I applied a few coats of stain resistant spray stuff to the fabric, let's see if it works!
I am pretty realistic when it comes to furniture and kids, wouldn't spend a ton of money on a table or expect it to not get dinged up with kids around, but I draw the line at "gross"... and it was super close! When my son had a friend over the other day and went to eat lunch at the table I heard him say to his friend "um, yeah...lets go eat at the other table"!! He was embarressed! Not cool.
Originally I was thinking about stripping and re staining the top but didn't love the table enough to do all that extra work, so my quick fix solution was to do a faux zinc finish to the top.
After sanding it down, it still had a black/dark base from the original stain, which is what I wanted. I used the technique that I did on my faux zinc letters tutorial and applied it to the top of the table, going back with a few different tones until I got the desired look. Then sealed it with 3 coats of a lacquer clear coat.
Since I was on a roll, I decided to reupholster the seats with some left over fabric I had and loved from another project. I applied a few coats of stain resistant spray stuff to the fabric, let's see if it works!
Thursday, June 14, 2012
GREEN APPLE...YUM!!
How cute did this turn out! I love the simplicity of this piece, no hardware, clean lines and pretty little angled feet. My client choose this awesome color to cordinate with here babies chevron crib set:)
The before...
The before...
Tuesday, June 12, 2012
MY SUMMER CHALLENGE AND BEAUTIFUL FRENCH PROVINCIAL BEDROOM SET
I am quickly realizing that this summer is going to be a bit of a challenge for me with the kids being home. My kids are 13, 11 and 8, so very self sufficient and can pretty much take care of themselves but I just feel so GUILTY when I am working! The hardest part is the fact that they want me to run them around to friends houses, pick up friends or our neighborhood pool, which is fine but I always look like this....
So either I change my clothes 18 times a day or I ALWAYS look like a complete mess. I swear some people who always see me like this and don't know what I do, think I am a wreck. They are probably right.
So here is a beautiful set that a gal and her husband brought for me to spray for her. She picked it up at a second hand store and it is such a beautiful set!
The original finish usually doesn't pose a problem, but unfortunately in this case it was pretty chippy and needed a LOT of sanding, taking it down to bare wood in some places with a lot of time spent on trying to smooth out the surface to have as seamless of a finish as possible. Lots of little drawers, doors and hardware bits and pieces.
We decided to keep and spray out the hardware in a dark bronze finish to match the bronze iron bed that they had just purchased. I also sprayed the screens inside the little night stand doors as well. I just love how this turned out. "Creamy" by SW is a great soft white color!
Tuesday, June 5, 2012
WHAT A TRANSFORMATION!
I am so glad I got a chance to transform this beautiful antique dresser for my friend. It was her grandmothers and although she loved it and it held sentimental value, she wanted it to fit in with her own decor.
Originally I was going to spray the entire piece in this pretty shade of purple. The old lacquer was really crackled and I wanted a smooth finish at least on the top surface, so I decided to strip it, which revealed a beautiful top that I didn't want to cover. So I ended up staining the top and just painting the base.
Here is the before shot, pretty, but not her style.
Thursday, May 17, 2012
MY NEW PIECE
Because I have been busy with customer projects, I have been neglectful of things I've been wanting to do around my own house. We have been using an old dresser in my kitchen as a "catch all" and "junk drawer" space (YES, I do need 9 drawers::)), but finally got around to refinishing it! Although I like the mini update we did to our kitchen to get us by when we moved in, it was pretty bland, definitely needed some color. Coral, being my favorite color right now was my obvious choice. I really like how it turned out and love the fact that it's a little unexpected for a kitchen, or any room in the house for that matter!
Here is the before, not so cool!
I wasn't sure at first if I should highlight with white or gold, but because I am on a gold kick too, I decided to with it. It looks really nice with the hardware that has some of the same shade of gold in it as well.
Here is the before, not so cool!
Monday, May 14, 2012
UPDATED ROCKER
I was so happy to refinish this antique rocking chair for my friend Jackie who was ready for a change and update in her home.
I love how the high gloss black lacquer turned out on this piece. She even wanted me to sign the bottom of the chair...so sweet:)
Friday, May 11, 2012
DRESSER TURNED BUFFET
Here is a perfect example of where a dresser doesn't just belong in a bedroom holding tee-shirts and undies...it can make an awesome piece in any room!
My friend Karla was in the market for a buffet type piece for her beautiful dining room. She wanted something modern, a little funky and functional. We played with ideas for a while, going back and forth on color, stain, mixing and blending. She likes both neutral colors and natural wood, but really wanted something that would make a statement without being a huge pop of color.... I do believe we got it right!
As much as I LOVE my customers who know exactly what they want, I also love to work with those who really have no idea at first but after shooting ideas back and forth, we figure it out:)
before...yucky!
My friend Karla was in the market for a buffet type piece for her beautiful dining room. She wanted something modern, a little funky and functional. We played with ideas for a while, going back and forth on color, stain, mixing and blending. She likes both neutral colors and natural wood, but really wanted something that would make a statement without being a huge pop of color.... I do believe we got it right!
As much as I LOVE my customers who know exactly what they want, I also love to work with those who really have no idea at first but after shooting ideas back and forth, we figure it out:)
before...yucky!
Tuesday, May 8, 2012
WHO KNEW?
Like the last one picked in gym class, I kind of felt sorry for these 2 guys! But I didn't give up on em. I knew they had potential and that with some TLC, could be awesome pieces for someone. I even think my client, Jennifer wasn't 100% sure at first, but deep down...she knew too!
She is an awesome mom who's letting who 2 boys, that share a bedroom, decorate it with their favorite sports themes. One loves U of M and the other Detroit. We found a perfect blue that will work for both team colors and will be adding a yellow "M" sticker and white "D" sticker on each top drawer.
SHE IS LETTING THEM DO WHAT THEY WANT! I really wish I could be more like that! After she left, my kids, who had been hanging out and listened in on our conversation were all over me...
"mom! She is letting them do whatever they want". "Why can't you be more like that"!
And I was like, "well, I let you put any posters you want up, don't I"?
And they are like "yeah, but only in the closet"!
True story... But I'm working on my "control over the kids decor in the bedroom" problem.
Here is a before of the the sad little guys
The Blue is a BM color called Van Duesen Blue. I sprayed the original hardware.
The after is much better!
Monday, May 7, 2012
THE BORING PART OF MY JOB AND WHY I ALMOST CRIED (THIS TIME:)
Here is one part of my refinishing jobs that although boring, tedious and takes a lot of time but is SUPER important! You want a nice, clean line when you open the drawers.
On a positive note, I get to catch up on what's happening around the world:) Sometimes I find myself spending way too much time reading articles, but for someone who spends most her day in a basement and doesn't even know which remote turns on the TV, I have to get my world news somehow! (OK, I do know how to turn on the TV)

Already sanded, vacuumed, wiped down with my "special" deglosser and ready to prime. I try to get a few pieces primed at ones, the least amount of times I have to clean out my spray gun, the better.
Like the graffiti? Bet you didn't know I was such a bad a**! Did ya?:)

Speaking of special Deglosser...I was really REALLY close to crying, but I didn't (that much).
So, I'm just minding my own business, cleaning my new sanded pieces off, spraying them with this deglosser concoction I made up, which is almost like a light stripper...to really get these pieces ready to take the primer, and look what happened::(( I guess a few drops got onto one of my brand new finished pieces! GRRRRRR! Can you see the little whitish dull spots?? Well I can and if it's not PERFECT I will go nuts! Now I have to redo the top. Oh well, lesson learned! This stuff really works!
On a positive note, I get to catch up on what's happening around the world:) Sometimes I find myself spending way too much time reading articles, but for someone who spends most her day in a basement and doesn't even know which remote turns on the TV, I have to get my world news somehow! (OK, I do know how to turn on the TV)
Already sanded, vacuumed, wiped down with my "special" deglosser and ready to prime. I try to get a few pieces primed at ones, the least amount of times I have to clean out my spray gun, the better.
Like the graffiti? Bet you didn't know I was such a bad a**! Did ya?:)
Speaking of special Deglosser...I was really REALLY close to crying, but I didn't (that much).
So, I'm just minding my own business, cleaning my new sanded pieces off, spraying them with this deglosser concoction I made up, which is almost like a light stripper...to really get these pieces ready to take the primer, and look what happened::(( I guess a few drops got onto one of my brand new finished pieces! GRRRRRR! Can you see the little whitish dull spots?? Well I can and if it's not PERFECT I will go nuts! Now I have to redo the top. Oh well, lesson learned! This stuff really works!
Wednesday, May 2, 2012
MAKE A STATEMENT
So, my new friend Jill contacts me about this entertainment center she has in her family room that she wants to use to bring some serious color to the room.
She stops over with the color she wants, all confident like.
"I want this color" she says.
I'm like... "are you SURE"?
She is like "yes, I like this one"
And I am like "are you totally sure? Don't you want to go home and obsess about it for a week or two and bug the heck out of your husband?" (Because that's what I would do)
But she is like "nope, definitely this one!"
Seriously, how does she do that! Knows exactly what she wants AND is pretty! I'm jealous!
Didn't this turn out great:)
She stops over with the color she wants, all confident like.
"I want this color" she says.
I'm like... "are you SURE"?
She is like "yes, I like this one"
And I am like "are you totally sure? Don't you want to go home and obsess about it for a week or two and bug the heck out of your husband?" (Because that's what I would do)
But she is like "nope, definitely this one!"
Seriously, how does she do that! Knows exactly what she wants AND is pretty! I'm jealous!
Didn't this turn out great:)
Here is the before...Nice, but not nearly as nice as the after!
Friday, April 27, 2012
HOW TO UPDATE AN OLD SEWING MACHINE CABINET
So on my little furniture shopping trips, I often run across old, sad looking sew machine cabinets that nobody wants or needs anymore. Some of these pieces are pretty cool and unique. Although most of them have little drawers that can not hold much, I have found cabinets with some good size drawers that would be perfect if converted to a desk...only if it wasn't for that big fat HOLE in the middle!
Or do what we did here...tacked down one side of the "flap", build a box under the area where the sewing machine would go and add a piano hinge to the other "flap". Makes for an awesome vanity!
See what is underneath the glass I put on top! A big ol' hold! But who cares! With this beautiful sheet of metallic glass on top you would never know! And check out the nice, deep drawers on this piece.
Here are a few options that I have come up with to work around that big fat hole!
Simply tack down the flaps and putty the seams...making for a nice, simple desk.
Or do what we did here...tacked down one side of the "flap", build a box under the area where the sewing machine would go and add a piano hinge to the other "flap". Makes for an awesome vanity!
Here is my new FAVORITE! I have been obsessed with (SOO many things) painting glass, in particular....back painted glass and have done it in different projects around my home. I love, love, LOVE the color coral and gold together and thought this would be a perfect project to use color combo.
I had a sheet of glass that was from an table project that had cracked on the edges. I took this to my friends over at Vos Glass where they cut my broken piece to the perfect dimensions of this desk top.
In one spray booth I was spraying the beautiful coral lacquer color. In another spray booth, I was back painting/spraying the glass and the original hardware in this gorgeous metallic gold color by Valspar. I sealed both the hardware and the back-painted glass for durability.
See what is underneath the glass I put on top! A big ol' hold! But who cares! With this beautiful sheet of metallic glass on top you would never know! And check out the nice, deep drawers on this piece.
Thursday, April 26, 2012
ANTIQUE DRESSER MAKEOVER
Thought I would do a quick post on this pretty little piece! It was one of those situations where you ALMOST walked away, your driving home thinking "I should have just walked away" but are so glad you didn't!
I love me some antique and "vintage" items, but this was VIIIINTAAAAAGE! I swear, someones sweet little great, great, grandpa put this beauty together nail by nail with his flimsy little hand saw for great, great grandma, and it's been loved and pasted down for years, right into my hands... well, actually into the hands of my new friend Andrea:)
I'm loving the beautiful deep blue color we chose. It is actually called "Deep Sea Blue" by SW. And I really think spraying a color on this piece makes the pretty details pop out even more. And who doesn't love glass knobs?
I love me some antique and "vintage" items, but this was VIIIINTAAAAAGE! I swear, someones sweet little great, great, grandpa put this beauty together nail by nail with his flimsy little hand saw for great, great grandma, and it's been loved and pasted down for years, right into my hands... well, actually into the hands of my new friend Andrea:)
I'm loving the beautiful deep blue color we chose. It is actually called "Deep Sea Blue" by SW. And I really think spraying a color on this piece makes the pretty details pop out even more. And who doesn't love glass knobs?
(ENTER... "PLUG" FOR SIMPLE REDESIGN::))
Now just for a second...ignoring the dusty lamp and annoying bright flash, would you just TAKE A LOOK AT THAT AWESOME FINISH!!!
Seriously! Could never achieve this finish with a paintbrush and roller, or even with someone who does have a sprayer but does not do quality work.
Friday, April 20, 2012
MY LAST REUPHOLSTERING JOB EVER (maybe)!! AND A SNEAK PEEK TO A KITCHEN RENO
Not sure why I do this...buy old chairs I don't even need and reupholser them. I obviously have an addiction to either cool old chairs, pretty fabrics I don't know what else to do with or simply torturing myself with 6 week projects. I sure it's all the above.
Here is a set I picked up. Pretty slipper chairs. I have tackled similar projects before, but nothing this involved, where I needed this metal strip tack thing and this cardboard edging thingy (thank you sweet man at the upholstering store for donating to me:). This really is not a tutorial at all, I have tried to block out the entire incident and do not remember much of the process, but there are a lot of talented woman on DIY blogs with some great step by step tutorials.
Here they are before...isn't that awesome that I took a picture of the backs but not the fronts? Seriously Julie?!
I started by removing the fabric so I could paint. I made sure to keep all the pieces so I could use them as my template for the new fabric.
My original plan was to do a Restoration type whitewash and grey stain technique on the frames. After I added the stripper to the chairs and started scraping, I quickly realized the front legs were not wood...but plastic:( I was not only bummed because I could not do my original finish, but the stripped ate away at the plastic so much that I had to so some serious sculpting with my wood putty to make it look good again. Plan B...I painted it white.
Here are just a few pics of the "during" process. Notice the condition of my living room in the background pictures...it looked like this for weeks!
LONG story short...here is the end result:) Not perfect by any means but I learned a LOT.
Here is another Cute one. I like these type of reupholstering jobs. Fun way to add pops of color, although I am sure some throw pillows would be a lot easier:)
SNEAK PEEK
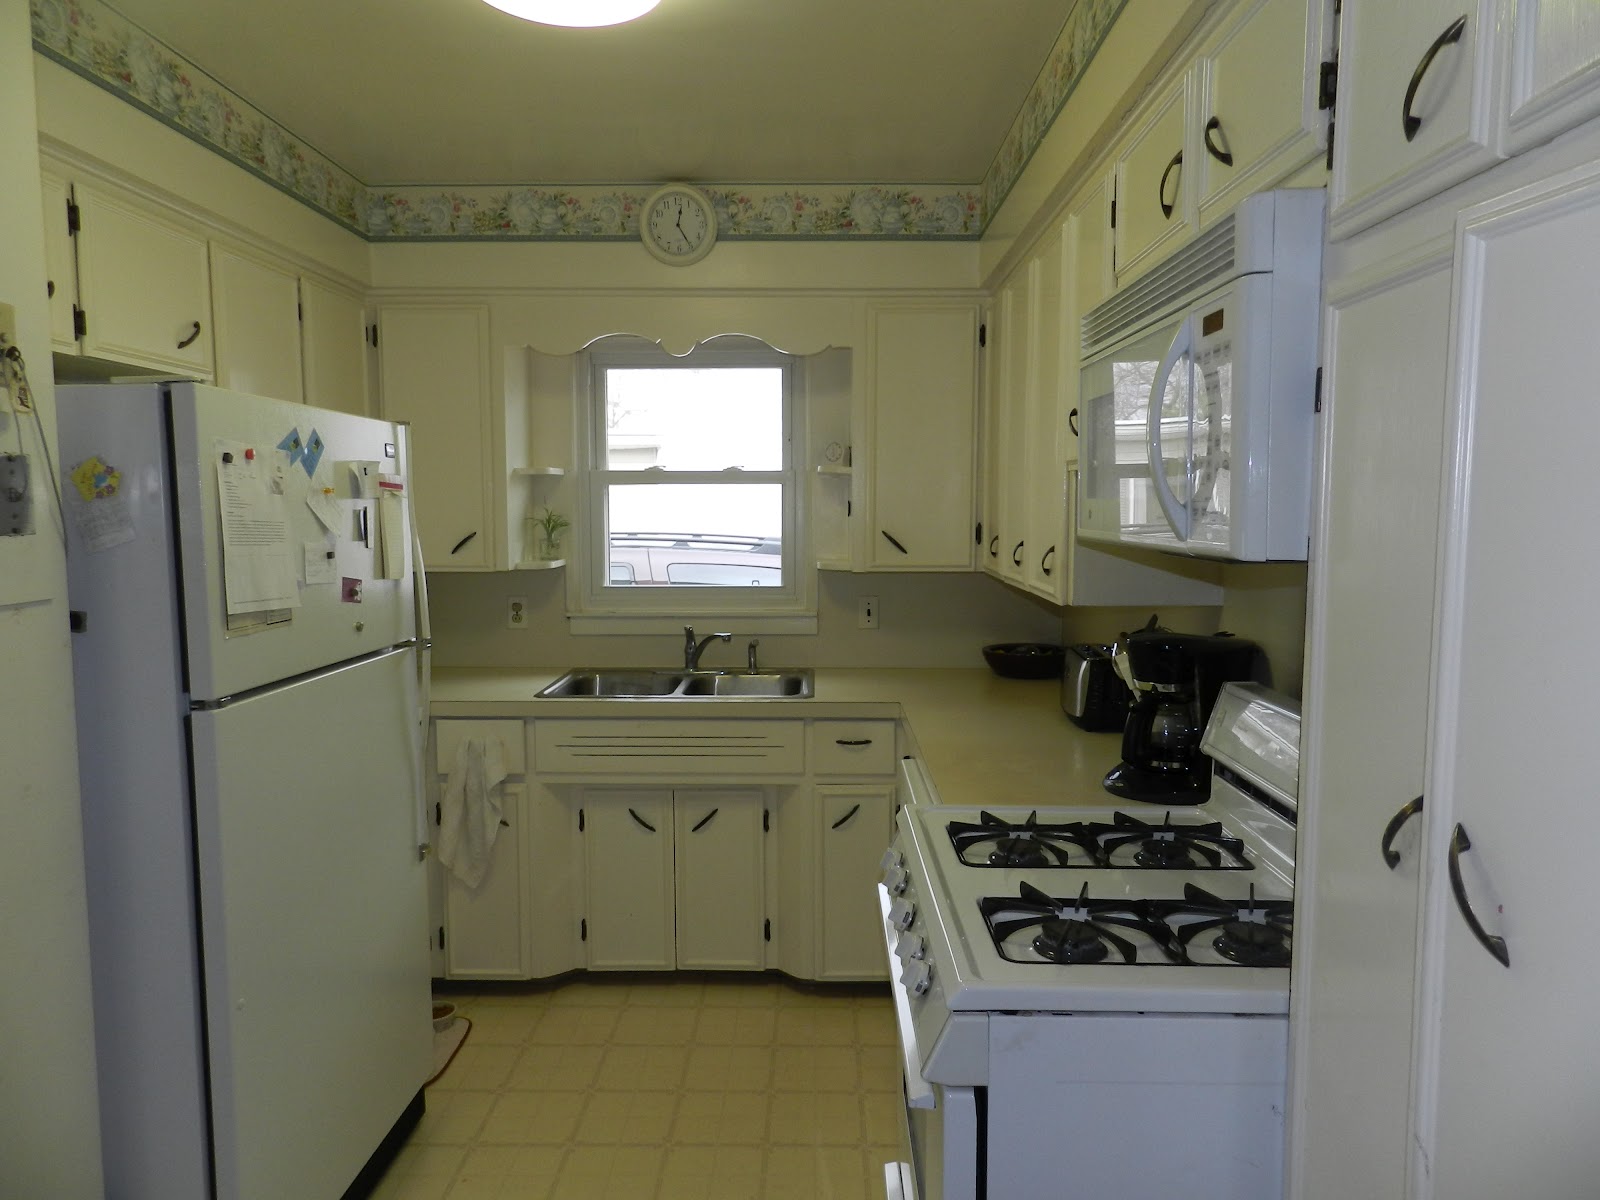
Here is a sneak peek at a current project I am doing. I am helping my mom and my darling 93 year old grandma, who lives with her. do a VERY budget friendly DIY kitchen update. Here are a few "before" and "during" pictures.
Here we are prepping and sanding down the frames. The cabinet drawers and doors are at my house, took them home to spray.
Here I am, spraying the frames. I sprayed the doors and drawers at my house.
Subscribe to:
Posts (Atom)